
How to prepare and optimise images
It’s important that images uploaded to a website are as optimised as possible, so the website loads and runs faster. You can check their size on the website with your browser’s “Inspector”.
Hover over the image you want to check. Right-click to open a menu and choose “Inspect”. A new window opens with the page code. Find the link to the uploaded image.
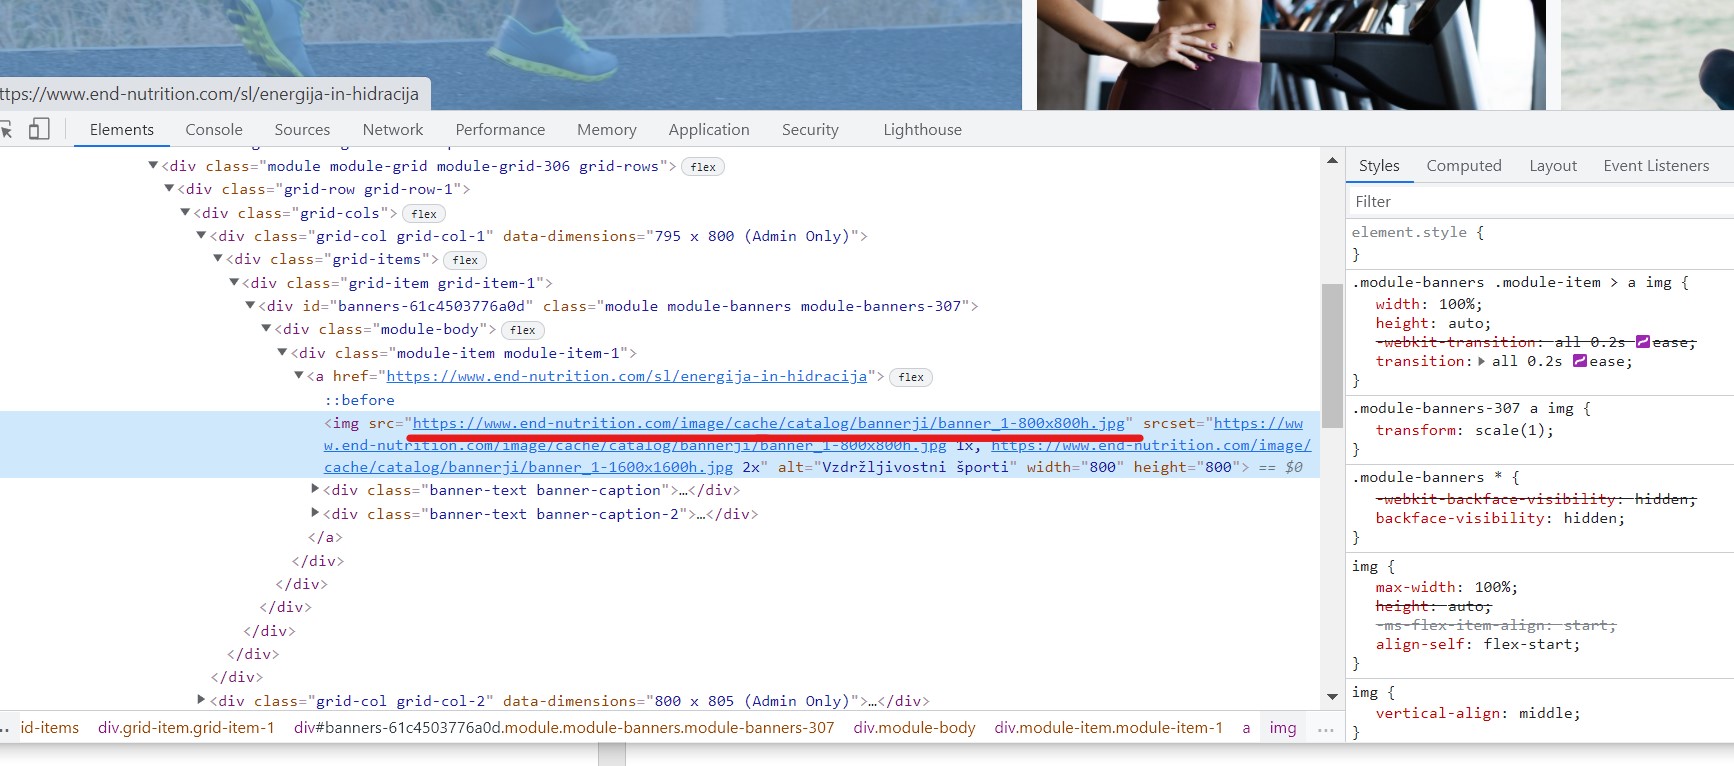
Just hover over this link and a small window shows the image properties.
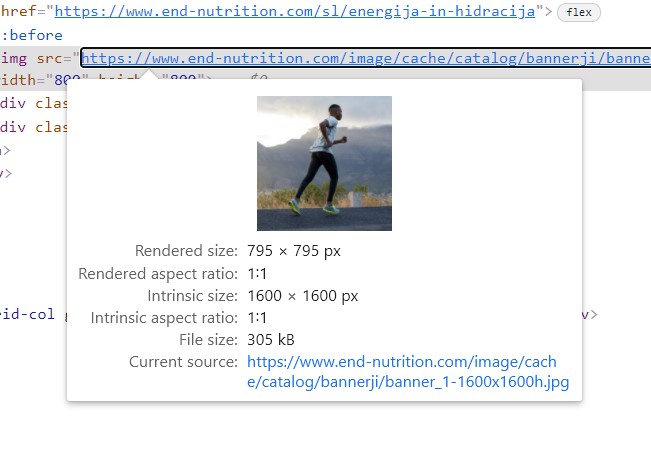
Rendered size
This is the size actually needed on the screen being viewed (the optimal size), in pixels, as shown when the page is visited. So the optimal size for this image before uploading is 795x795px.
Intrinsic size
This is the actual size of the image uploaded to the website. In our example, the image is too big and slows the page down needlessly.
File size
The file size is 305 kB. After optimisation, it’s reduced to 77 kB, so the optimised image loads 4x faster without any visible loss of quality.
From these values, we can see that in our example an image of 800×800 px would be enough – meaning we can halve the image size.
Photopea
Photopea is an online image editor that, unlike the similar professional tool Adobe Photoshop, doesn’t need installing on your computer. Photopea offers many ways to edit images; below we show you how to reduce the image size.
Also pay attention to the image resolution (dpi). Standard screens show up to 72 dpi, and Retina screens up to 144 dpi. Some images are made at 300 dpi for printing. Use Photopea to reduce the resolution to the optimal value (we recommend 72 dpi).
Depending on the type of image, the image format also matters a lot, as formats compress differently. The most widely used is .JPG, which offers the best balance between quality and file size. Use PNG only for smaller images where you need a transparent background.
- Open the editor: https://www.photopea.com/
- Drag the image you want to optimise into the window.
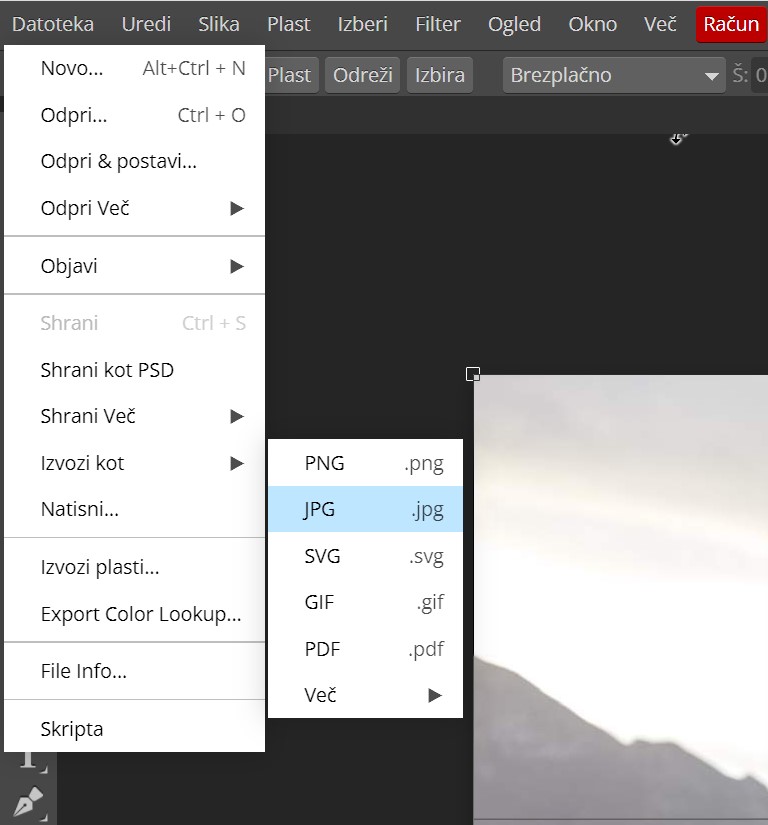
- In the top left corner, go to File > Export as > JPG
4. In the new window, you can set the new size in pixels. Set the smaller value to 800 px (the value we worked out in the previous section). If you select the chain icon, the other value adjusts automatically in proportion.
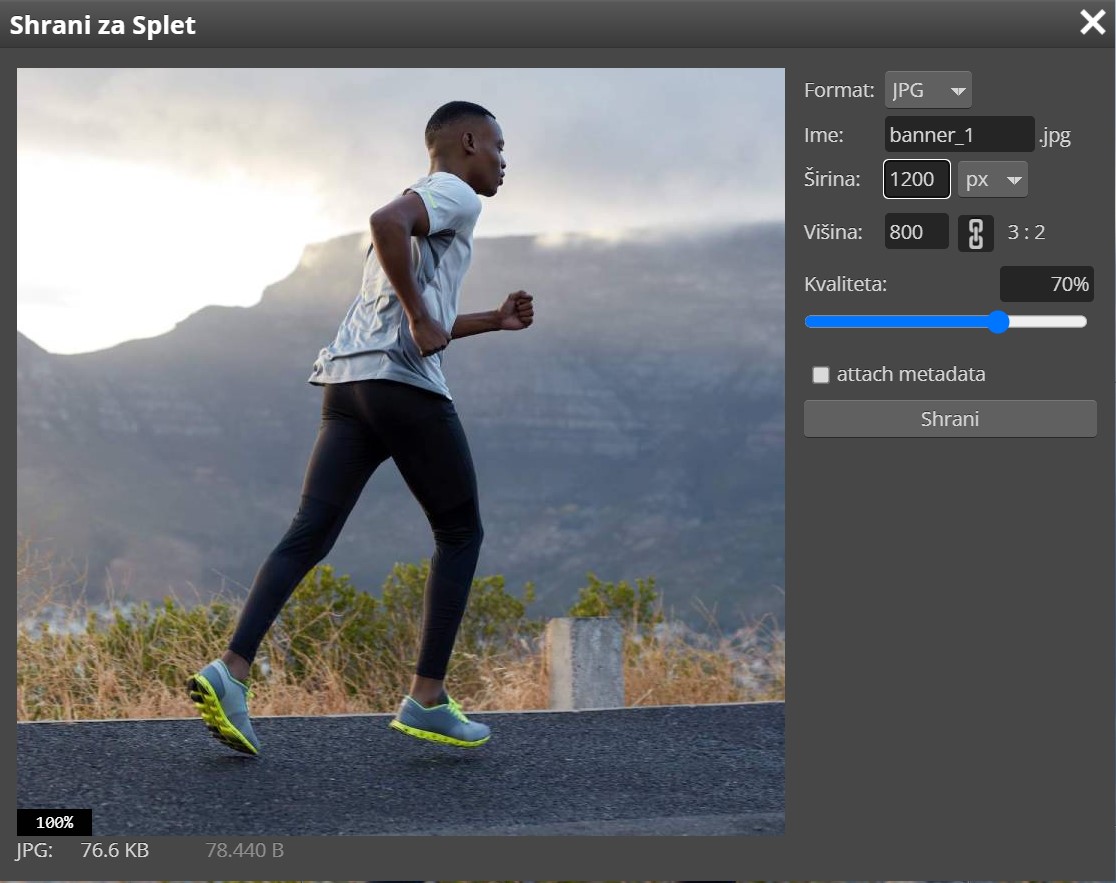
5. Click “Save” and the smaller image downloads to your computer.
Extra optimisation
The better optimised your images are before you upload them to the server, the faster the website works and the better the visitor’s experience. Google will also rate your website better, so image optimisation is essential for proper on-site optimisation.
The online tool ImageCompressor is also very handy for compressing your images further. Resize them and set the right resolution first!
We recommend this one: https://imagecompressor.com/
Steps:
- Drag the image you want to optimise into the window.
- Use the slider to the right of the image to lower the quality, which also reduces the final file size. Keep lowering it until the quality looks noticeably worse.
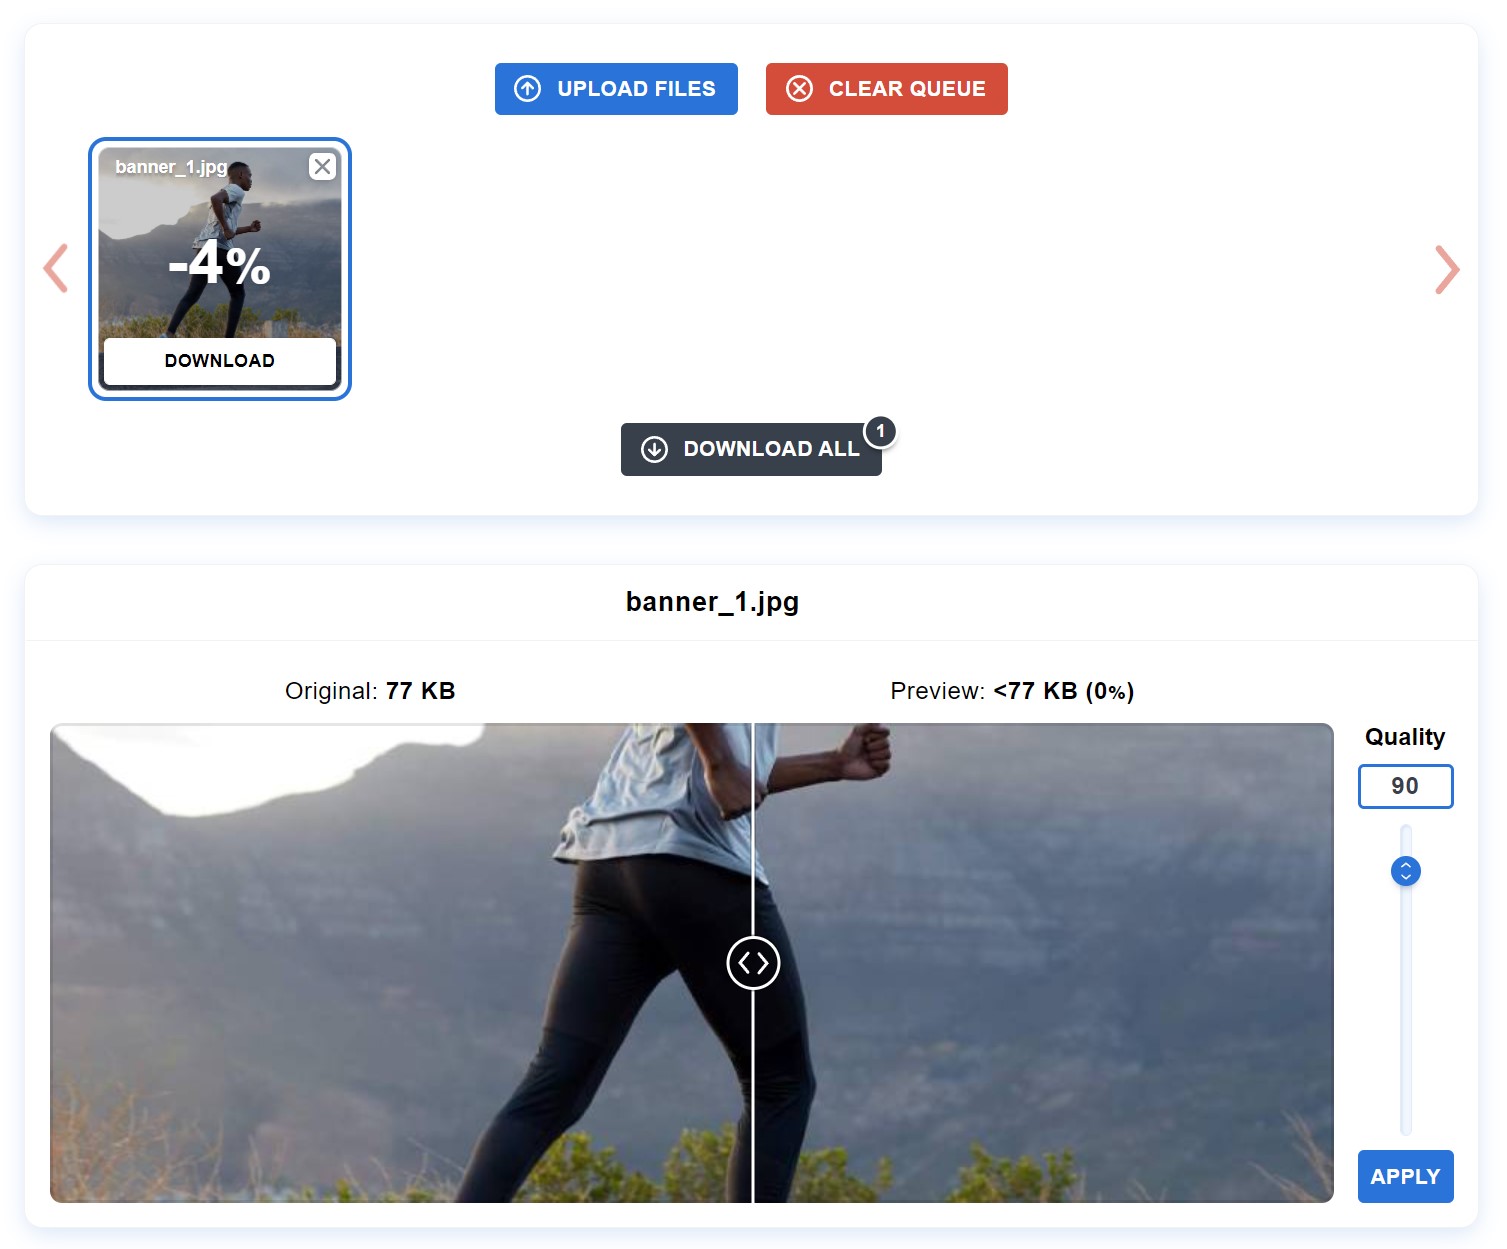
3. When you’re happy with the result, click “Download”.
The optimised image is now ready to upload to the server and add to your website.
SEO tip for images
Optimise the image and name it so it contains the key phrase you want to optimise the page for. The image URL SHOULD contain the keyword and should NOT contain special characters, accented letters or spaces (replace them with “-” or “_”).