
Pages are your website’s permanent content: home page, about us, contact, terms and conditions. This guide explains how to create a page, edit it with Bricks, how the page hierarchy works and what Bricks templates are.
In short: a page in 6 steps
- In the menu, open Pages → Add New Page.
- Enter the page title .
- If needed, choose a parent page in the page attributes.
- Click Edit with Bricks and build the content.
- Fill in the SEO fields (Rank Math or Yoast).
- Click Publish and add the page to the menu (see Bricks – Editing the menu).
1. Page list
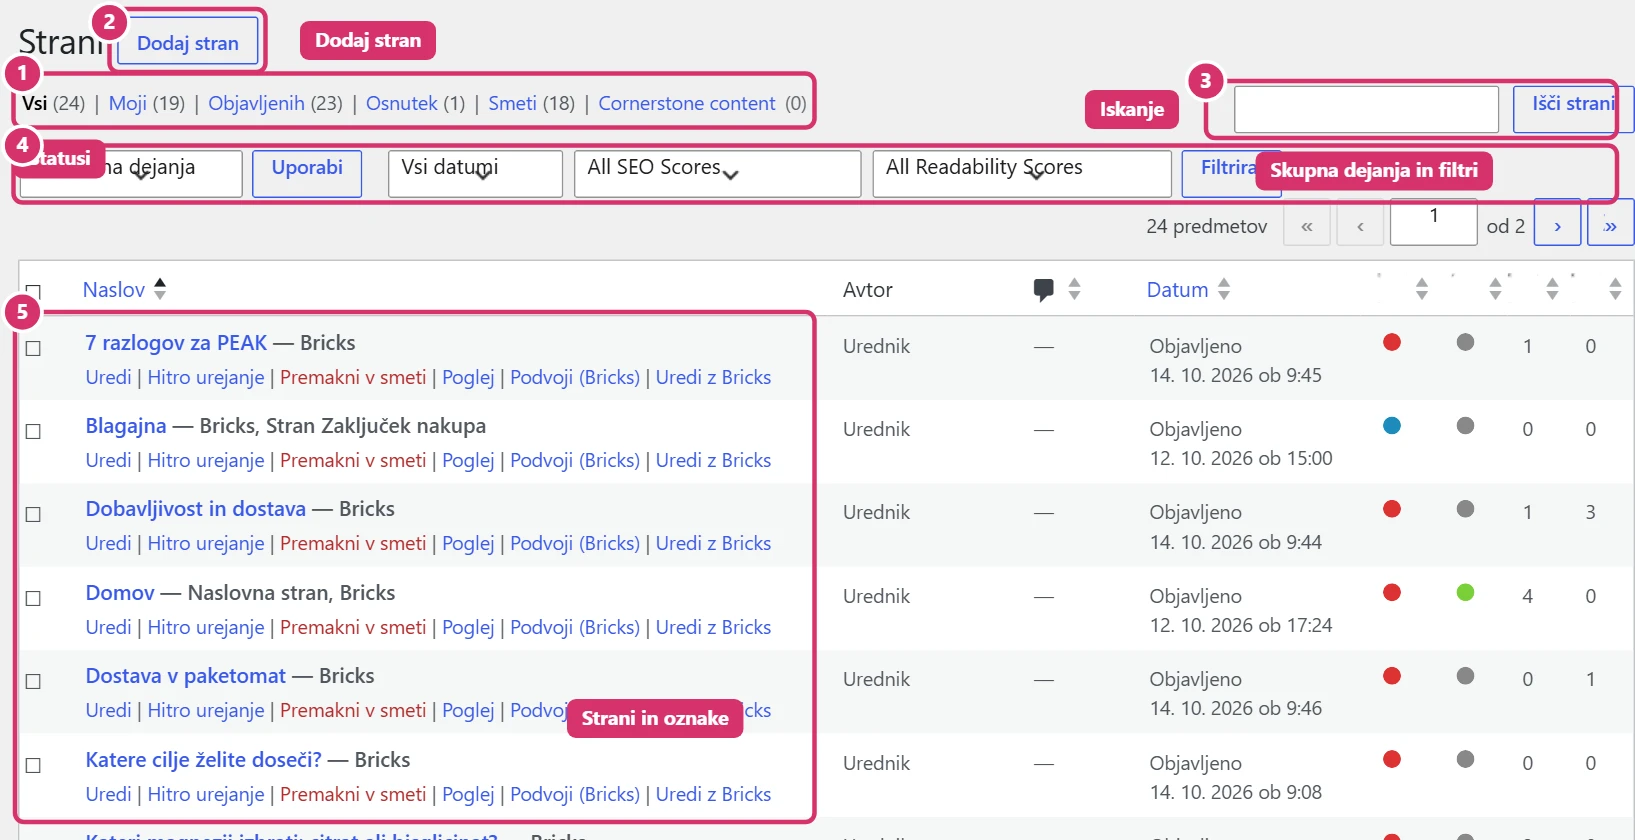
You’ll find pages under Pages → All Pages. Next to the title are labels showing how the page was built and what role it has: Bricks (the page is edited with Bricks), Front Page (home page) or Checkout Page (WooCommerce). Below the title are the links Edit (basic editor), Edit with Bricks (visual editor), Quick Edit, Duplicate and Move to Bin.
2. New page and hierarchy
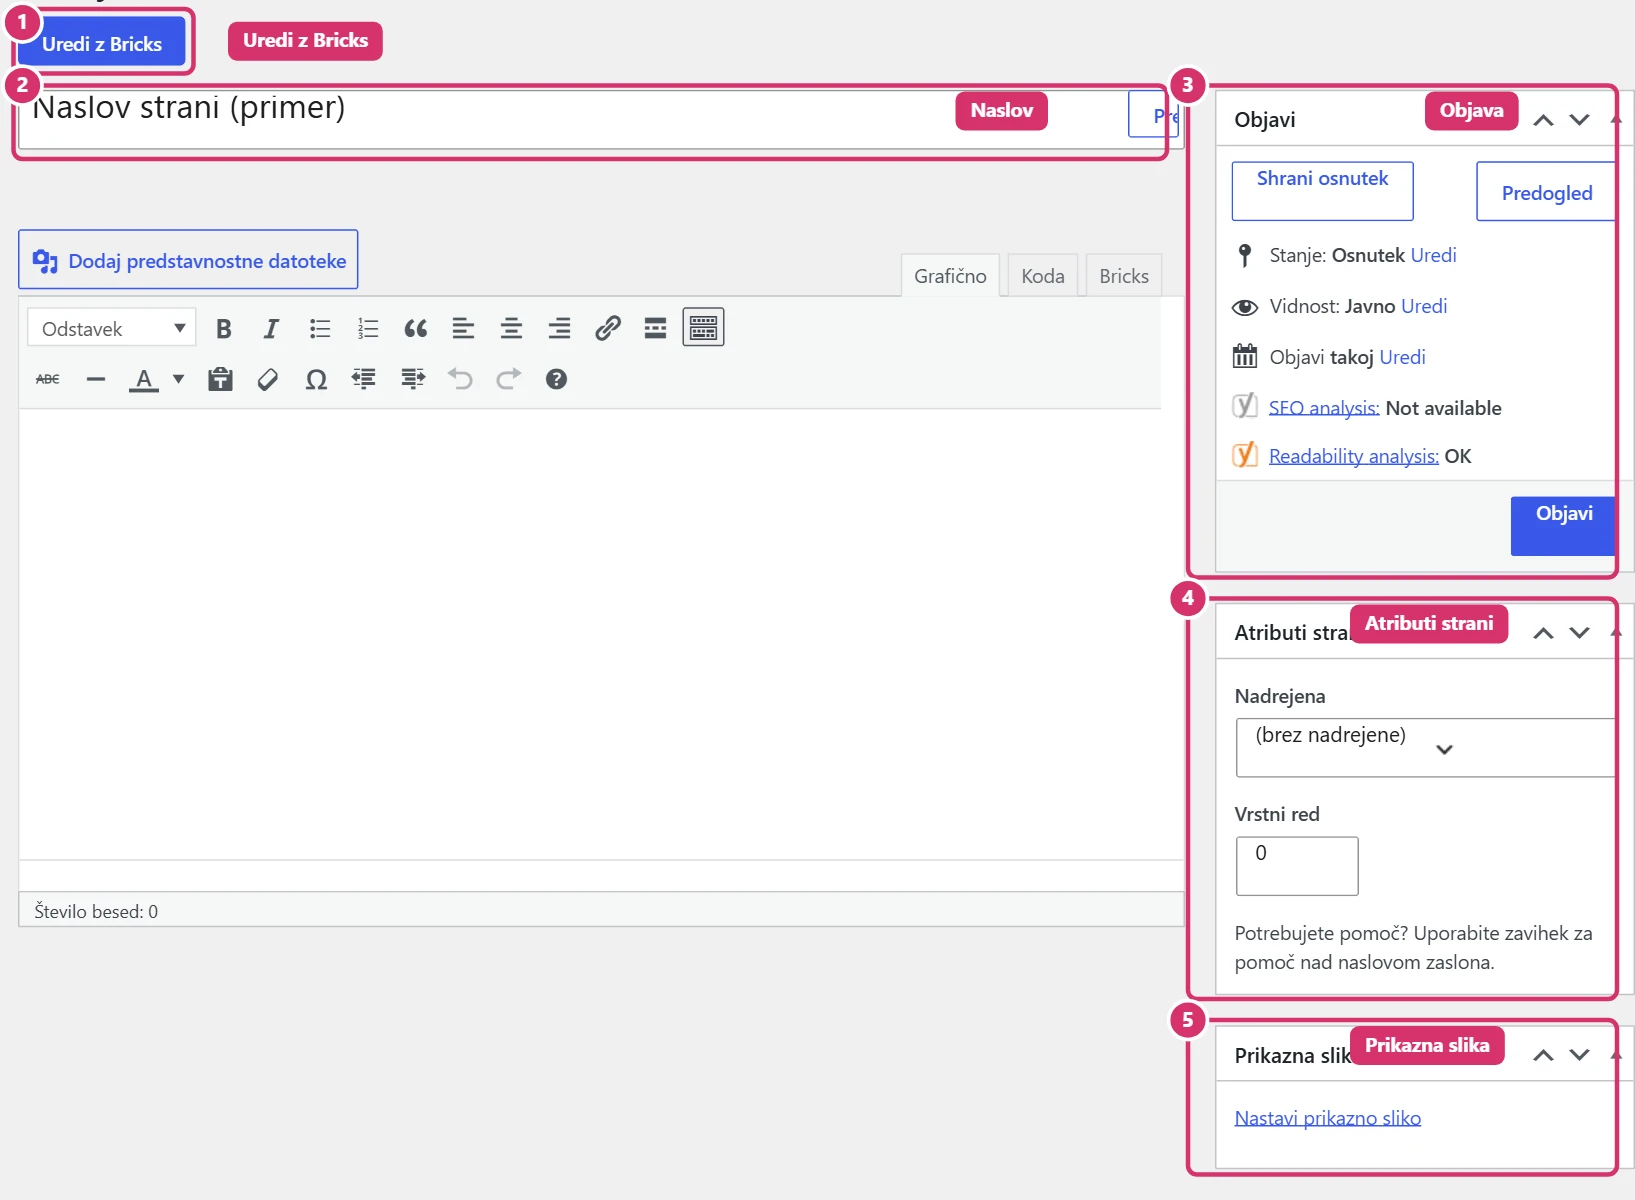
Click Add New Page, enter the title and click Edit with Bricks. In the Page Attributes box, you can choose a parent page (e.g. Terms and conditions under About us) and the order. The parent page affects the page’s address (URL), so choose it before publishing. Also set a featured imageif the theme uses one.
3. Editing a page with Bricks
The Edit with Bricks button opens the visual editor. You build the content from elements (section, container, heading, text, image, button). Visitors don’t see changes until the page is saved and published, so click Saveregularly in the editor. To work safely, first duplicate the page (Duplicate) and change the copy, leaving the original published.
4. Bricks templates
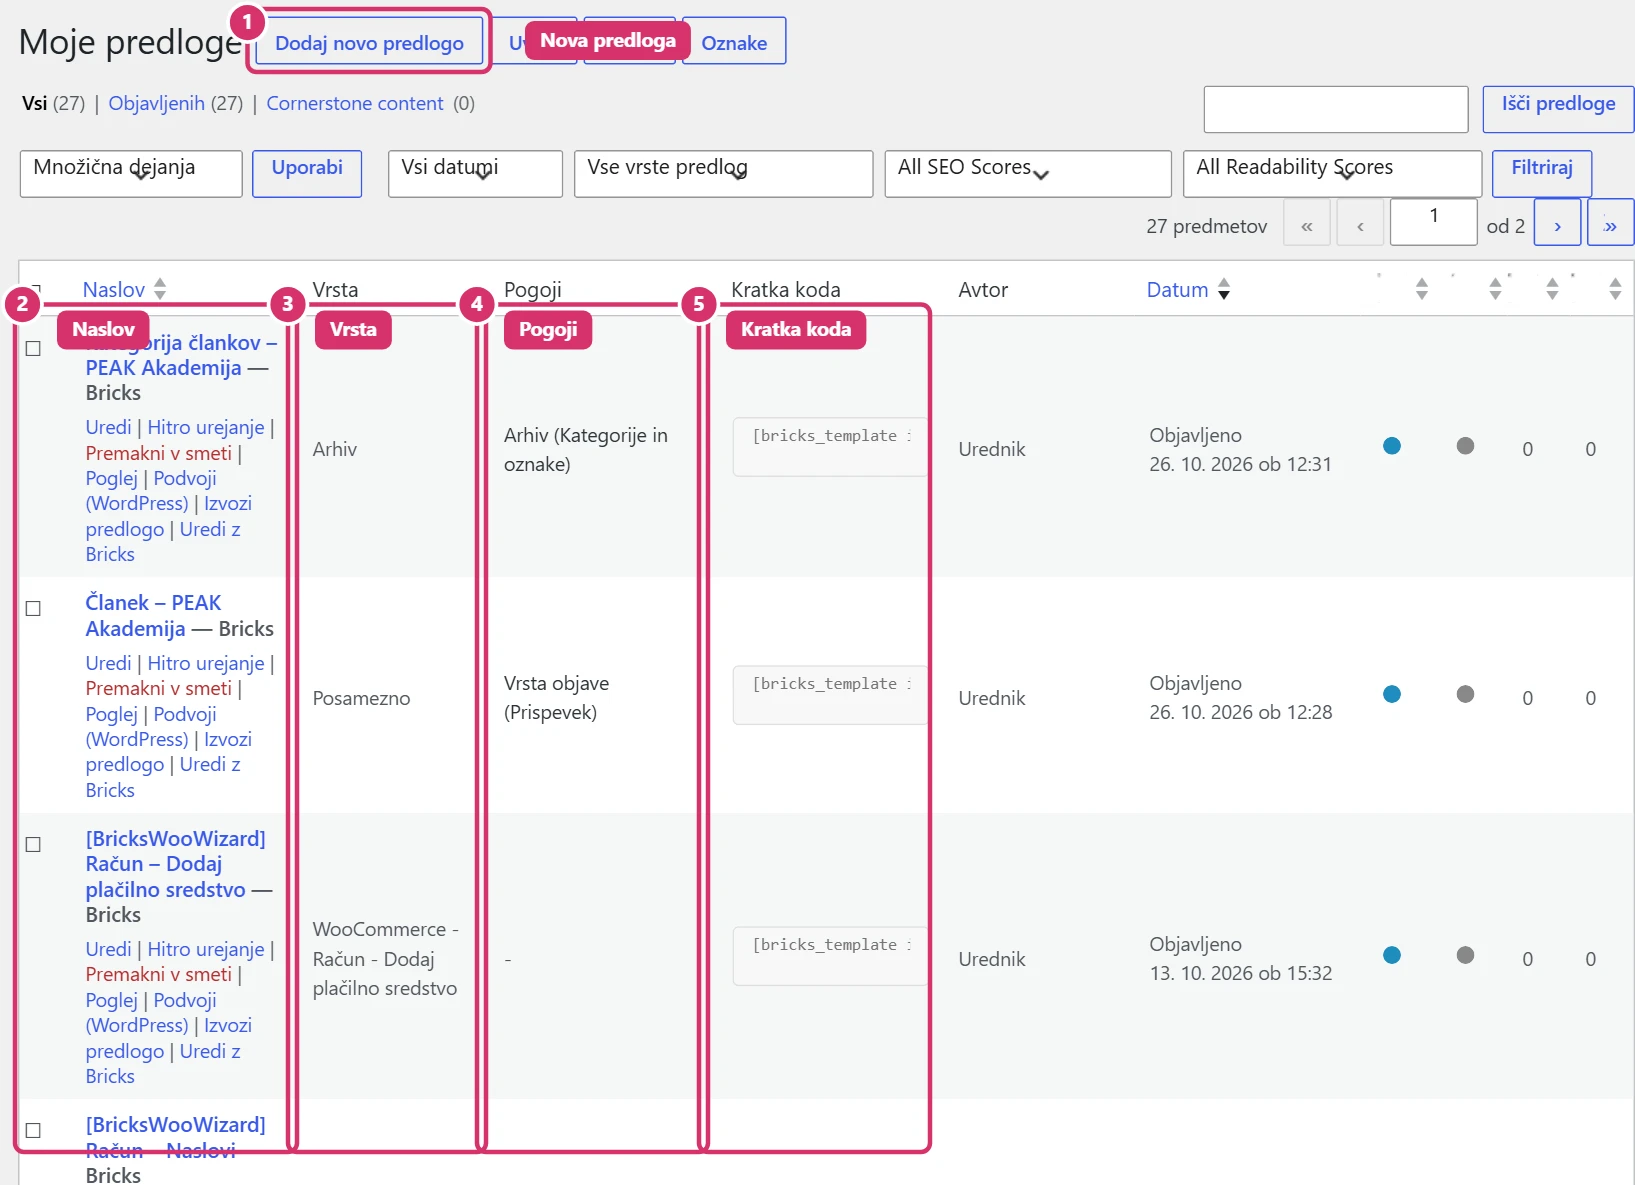
Bricks templates (Bricks → Templates) set the shared look of parts of the website: header, footer, product pages, blog archive, cart, checkout, search and 404 pages. Each template has a type and conditionsthat say which pages it appears on. You edit a template the same way as a page. Change conditions carefully, as they can override the look of several pages at once. You can also insert a template with a shortcode.
5. Special pages
The home page and posts page are set under Settings → Reading. WooCommerce pages (cart, checkout, my account) are set under WooCommerce → Settings → Advanced; don’t delete these pages. For pages you don’t want to show in search engines, use the setting in the SEO plugin (see Bricks – SEO with Rank Math).