
Every order in your online store has its own status, items and history of notes. This guide explains how to review orders, change their status, add a note or message for the customer and issue a refund. Personal data in the screenshots has been replaced with made-up examples.
In short: processing an order in 6 steps
- In the menu, open WooCommerce → Orders.
- If needed, filter by status or search for the order by number, name or email.
- Click the order number to open the details.
- Check the products, shipping and payment.
- Change the status and click Update.
- If needed, add a note or issue a refund.
1. Order list and statuses
You’ll find the list under WooCommerce → Orders. At the top are the statuses with the number of orders (All, Processing, On hold, Completed etc.). Click a status to show only those orders. Below them are a date filter and a search by order number, customer name or email address. Use the Add order button when you enter an order manually (e.g. a phone order).
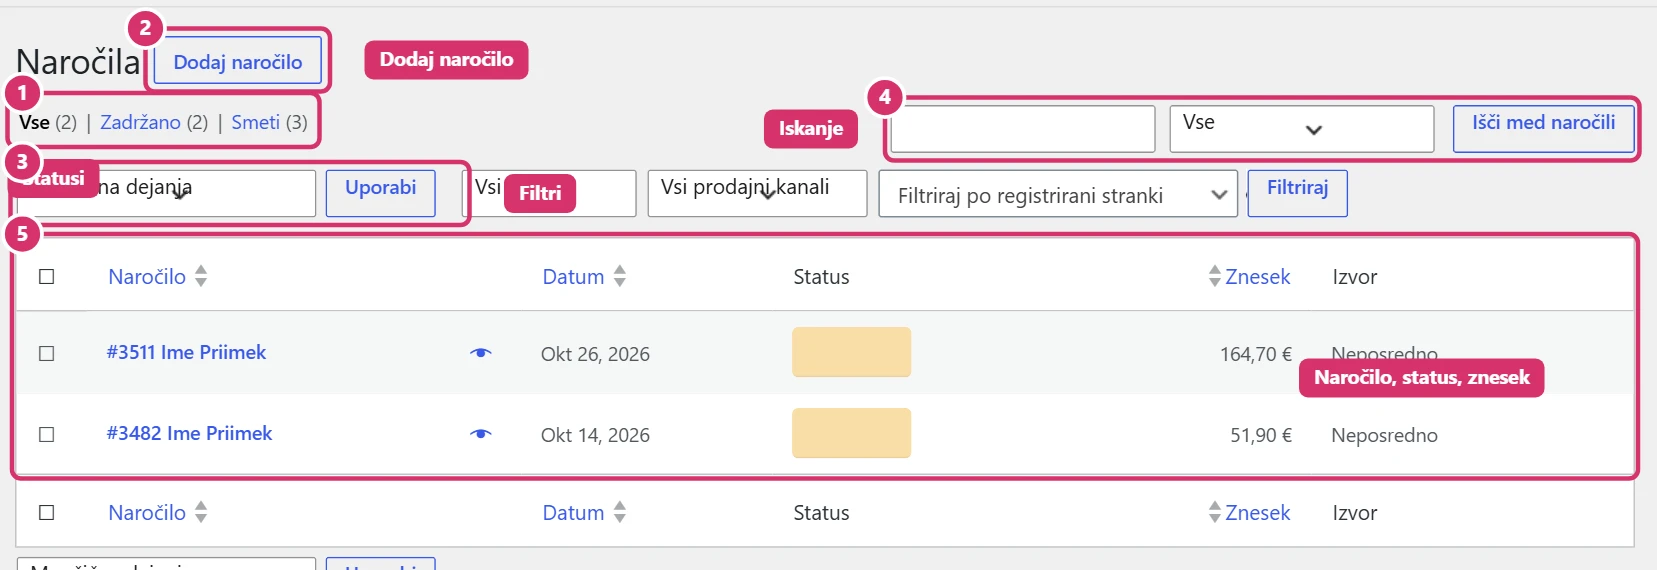
What the most common statuses mean:
- Pending payment – the customer has started a payment that hasn’t been confirmed yet.
- Processing – payment received; the order needs to be prepared and shipped.
- On hold – waiting for payment (e.g. a bank transfer) or your confirmation.
- Completed – the order has been shipped or collected.
- Cancelled, Refunded, Failed – the order wasn’t carried out or was returned.
You can select several orders at once and change the status of all of them in the Bulk actions menu.
2. Order details
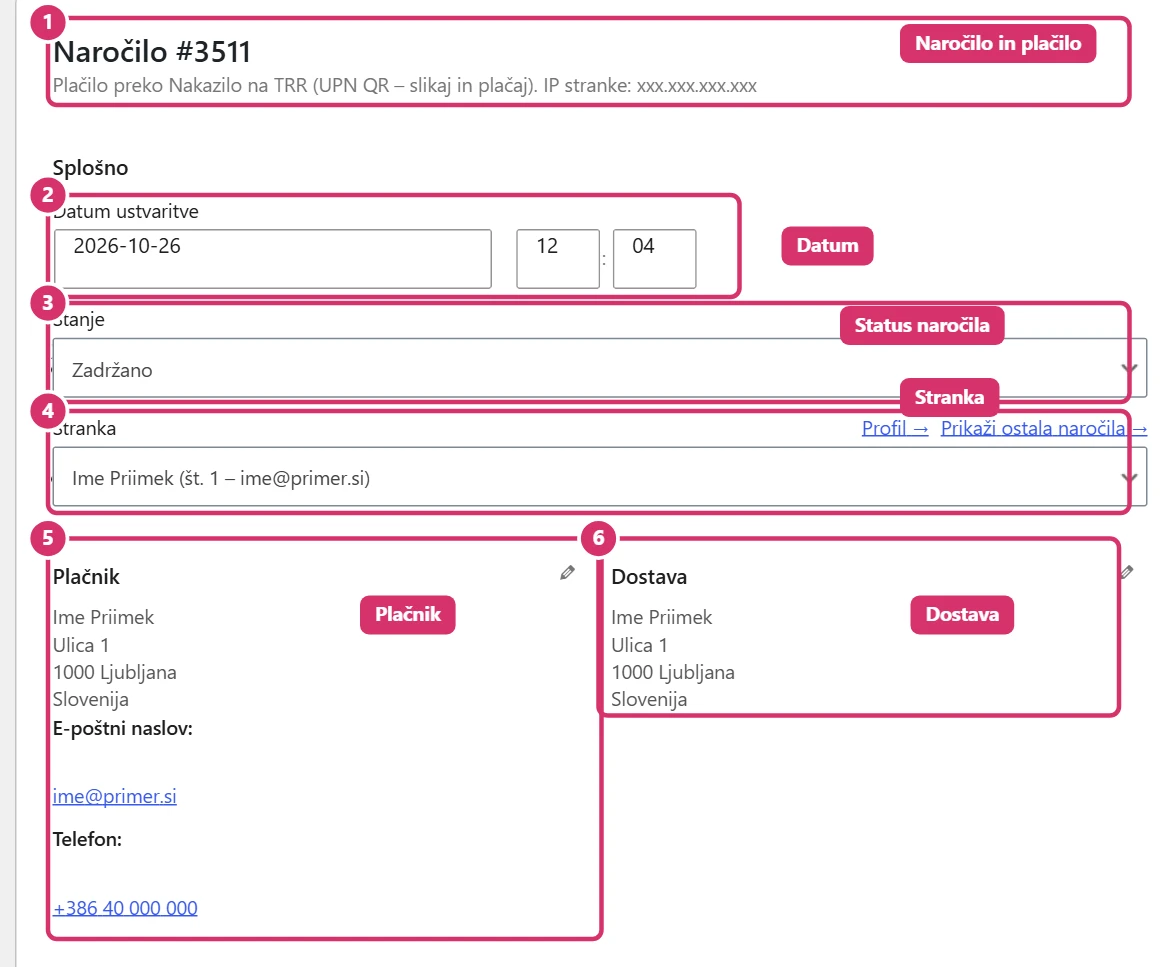
When you click the order number, a page opens with all the details. At the top you see the order number and payment method, then the date created, the status, the linked customer and the billing and shippingaddresses. You can correct the addresses by clicking the pencil.
3. Changing the status
Change the status in the Statusfield. Choose the new status and click Update (top right). When you change it, the customer automatically gets the right email, e.g. when it moves to Completed a confirmation that the order has been fulfilled.
4. Items, shipping and totals
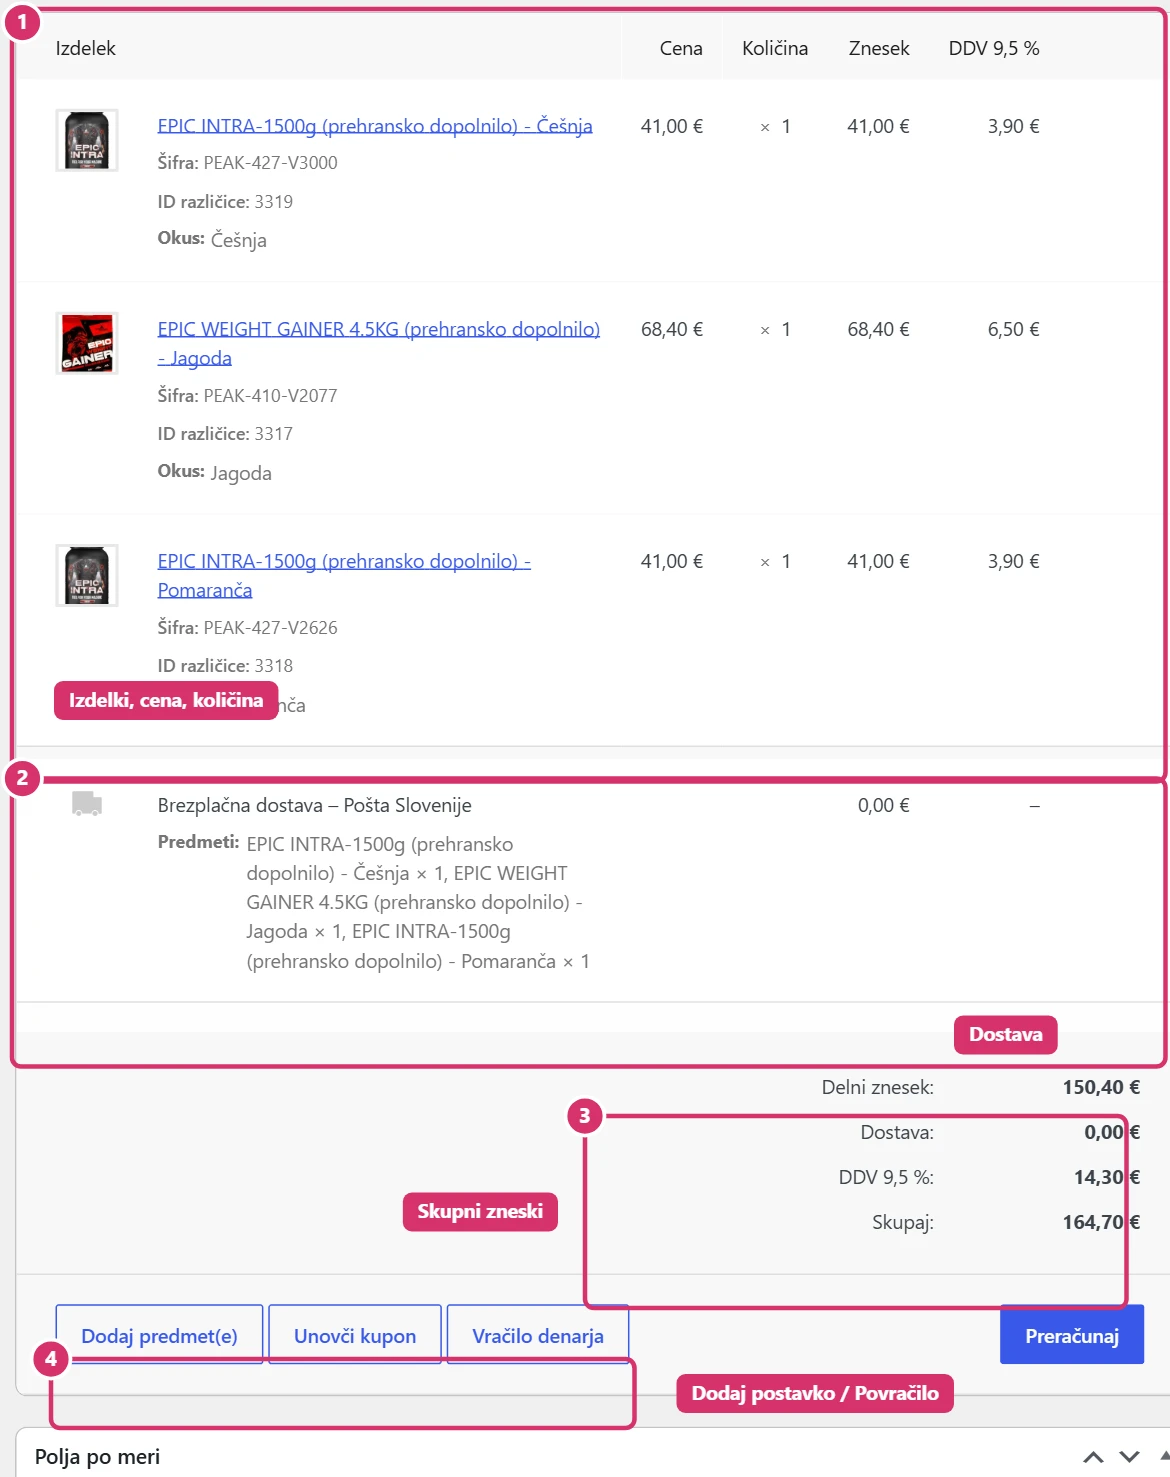
Below the details is a table of items: product (with variation, SKU and properties), price, quantity and total including VAT. Below the products is a shippingline, and below that the totals (subtotal, shipping, VAT, total). With the Add item(s) button, you add a product, shipping or a fee; with Recalculate you refresh the totals after each change.
5. Order notes
In the right column you’ll find the Order notesbox. There are two kinds of notes: only you and your colleagues see a private note , while a note to customer is emailed to the customer (e.g. a parcel tracking number). Choose the type, enter the text and click Add. The system also adds notes itself (status changes, payments).
6. Refund
The Refund button below the items opens a form where you enter the quantities or amount to refund. With Refund manually you record that you returned the money yourself (e.g. by bank transfer); with the automatic refund button, the payment gateway returns the money, if it supports this. Check the refund in the order totals before leaving the page.
You edit the products customers order as described in the guide Bricks – Products, and variations as described in the guide Bricks – Attributes and variations.