
A coupon is a code that gives the customer a discount or free shipping when they buy. This guide explains how to create, restrict and publish a coupon, and how to set sale prices on products. The code in the screenshots (POMLAD10) is just an example.
In short: a coupon in 6 steps
- In the menu, open Marketing → Coupons (or WooCommerce → Coupons) and click Add coupon.
- Enter a coupon code or create one with the Generate coupon code.
- Choose the discount type and enter the amount.
- If needed, set an expiry date.
- On the Usage restriction and Usage limits tabs, set the conditions.
- Click Publish.
1. General coupon details
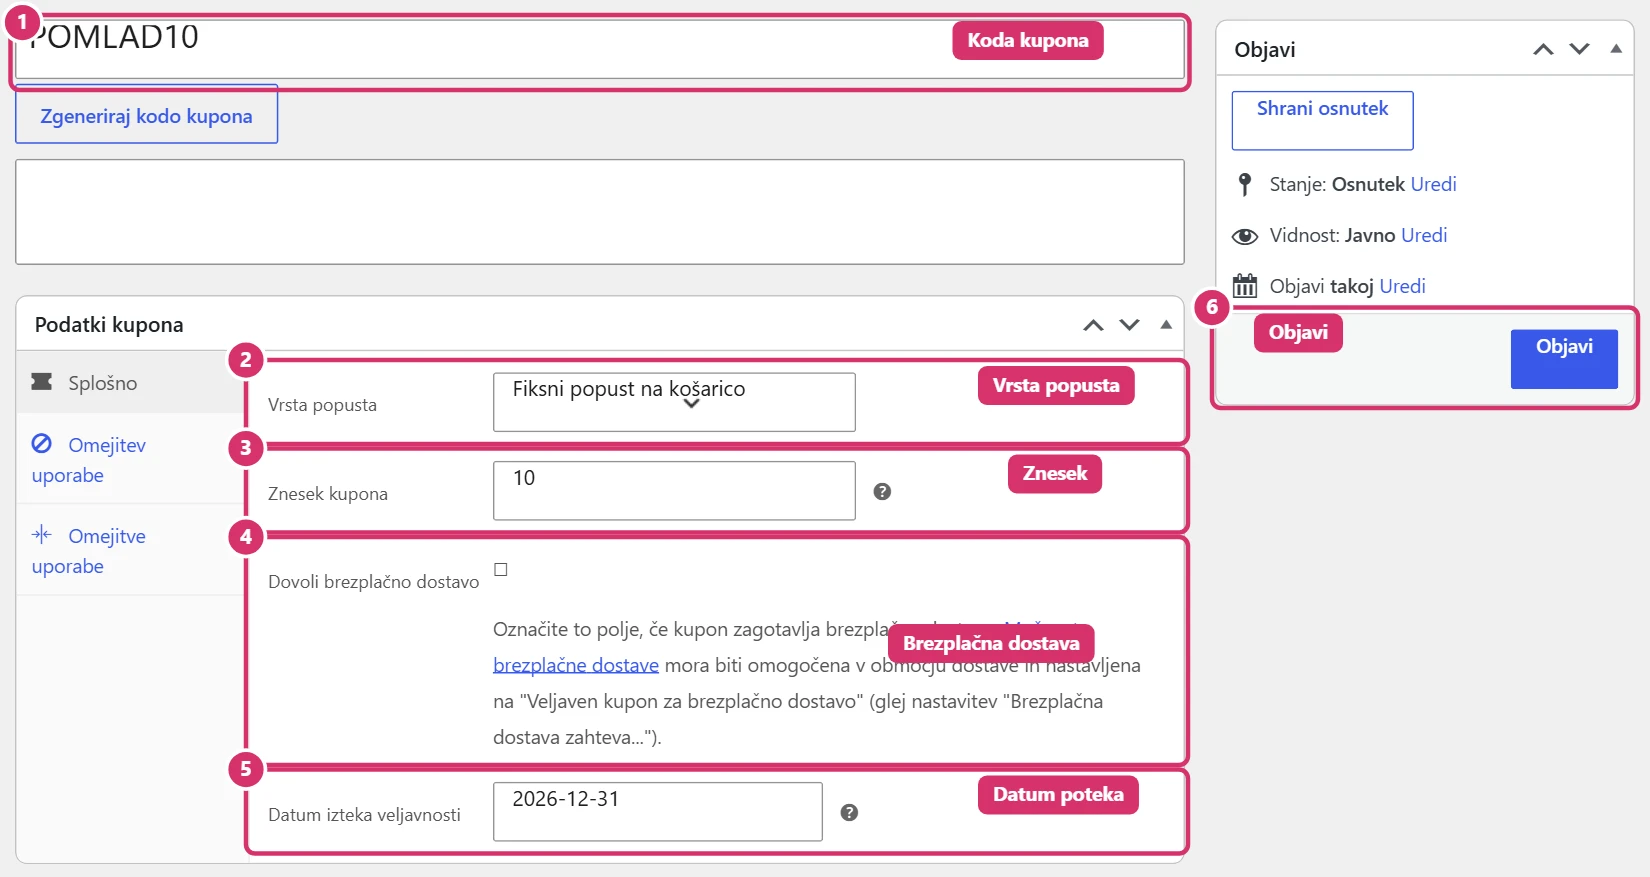
For a new coupon, first enter the codethe customer will type in the cart. Keep it short and easy to read, without accented letters. Then choose the discount type: percentage discount (e.g. 10%), fixed cart discount (e.g. €5 off the total) or fixed product discount. Below that, enter the coupon amount. Ticking Allow free shipping means the coupon also gives free shipping (if the coupon option is enabled in the shipping settings), and in the Coupon expiry date field you set until when the coupon is valid.
2. Usage restriction
On the Usage restriction tab, set when the coupon applies:
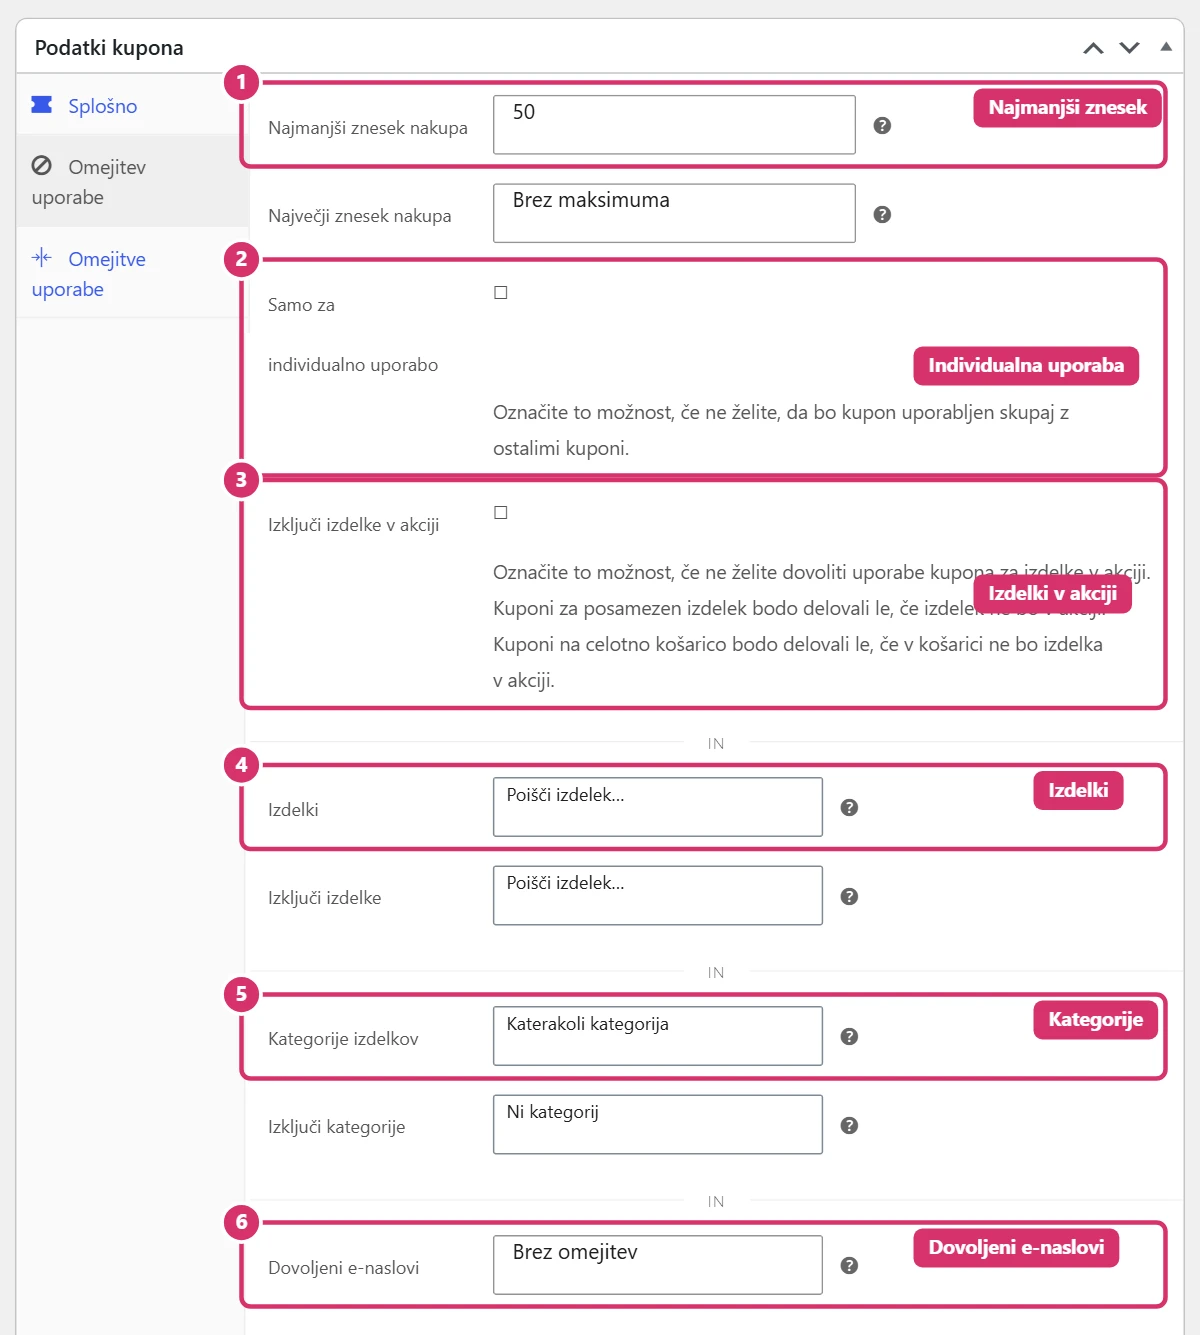
- Minimum / maximum spend – the coupon only applies to carts in this range.
- Individual use only – the coupon can’t be combined with other coupons.
- Exclude sale items – the coupon doesn’t apply to products with a sale price.
- Products, categories and brands – the coupon only applies to the selected ones (or you exclude them).
- Allowed emails – only the listed customers can use the coupon.
3. Usage limits
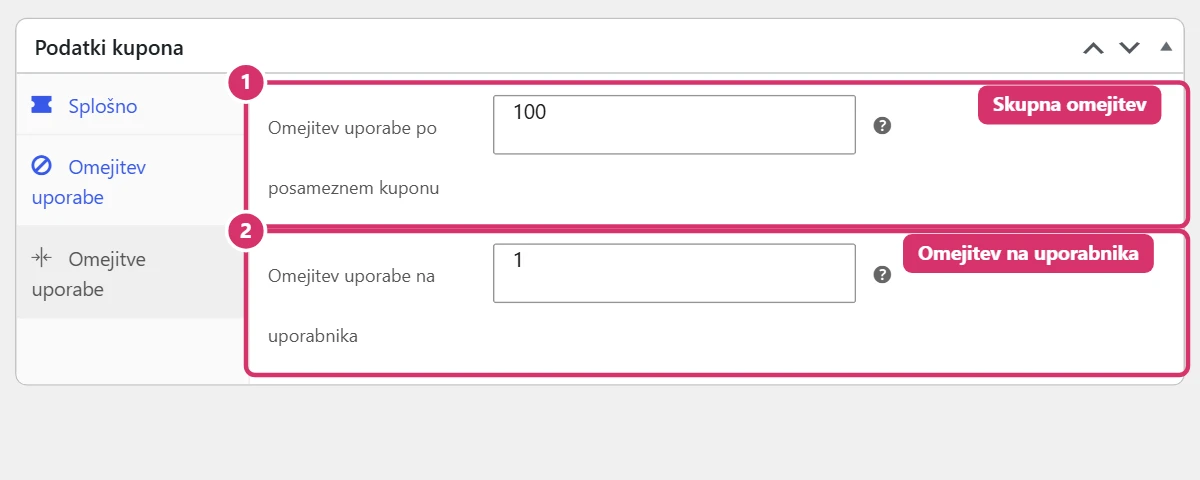
On the Usage limits tab, set how many times the coupon can be used: in total (e.g. the first 100 customers) and per customer (e.g. once). An empty field means no limit.
4. Publishing and testing
Publish the coupon with the Publishbutton. Then test it in the cart: add a product, enter the code and check the discount. To turn a coupon off temporarily, set it back to draft or move it to the bin. The coupon list also shows how many times it’s been used.
5. Product sale prices
For a sale without a coupon code, set a sale price directly on the product: on the General tab of the product data, enter the Sale price and, if you like, click Schedule for the sale’s start and end dates. The process is described in the guide Bricks – Products; for products with variations, enter the sale price on each variation separately (see Bricks – Attributes and variations).