
Posts are the articles on your blog: news, tips, announcements. This guide explains how to write a post, give it a category, tags and a featured image, and publish it or save it as a draft.
In short: a post in 6 steps
- In the menu, open Posts → Add New Post.
- Enter the title and write the text in the editor.
- Choose a category and add tags.
- Set the featured image.
- Fill in the SEO fields in Rank Math or Yoast (title, description, keyword).
- Click Preview, then Publish.
1. Post list
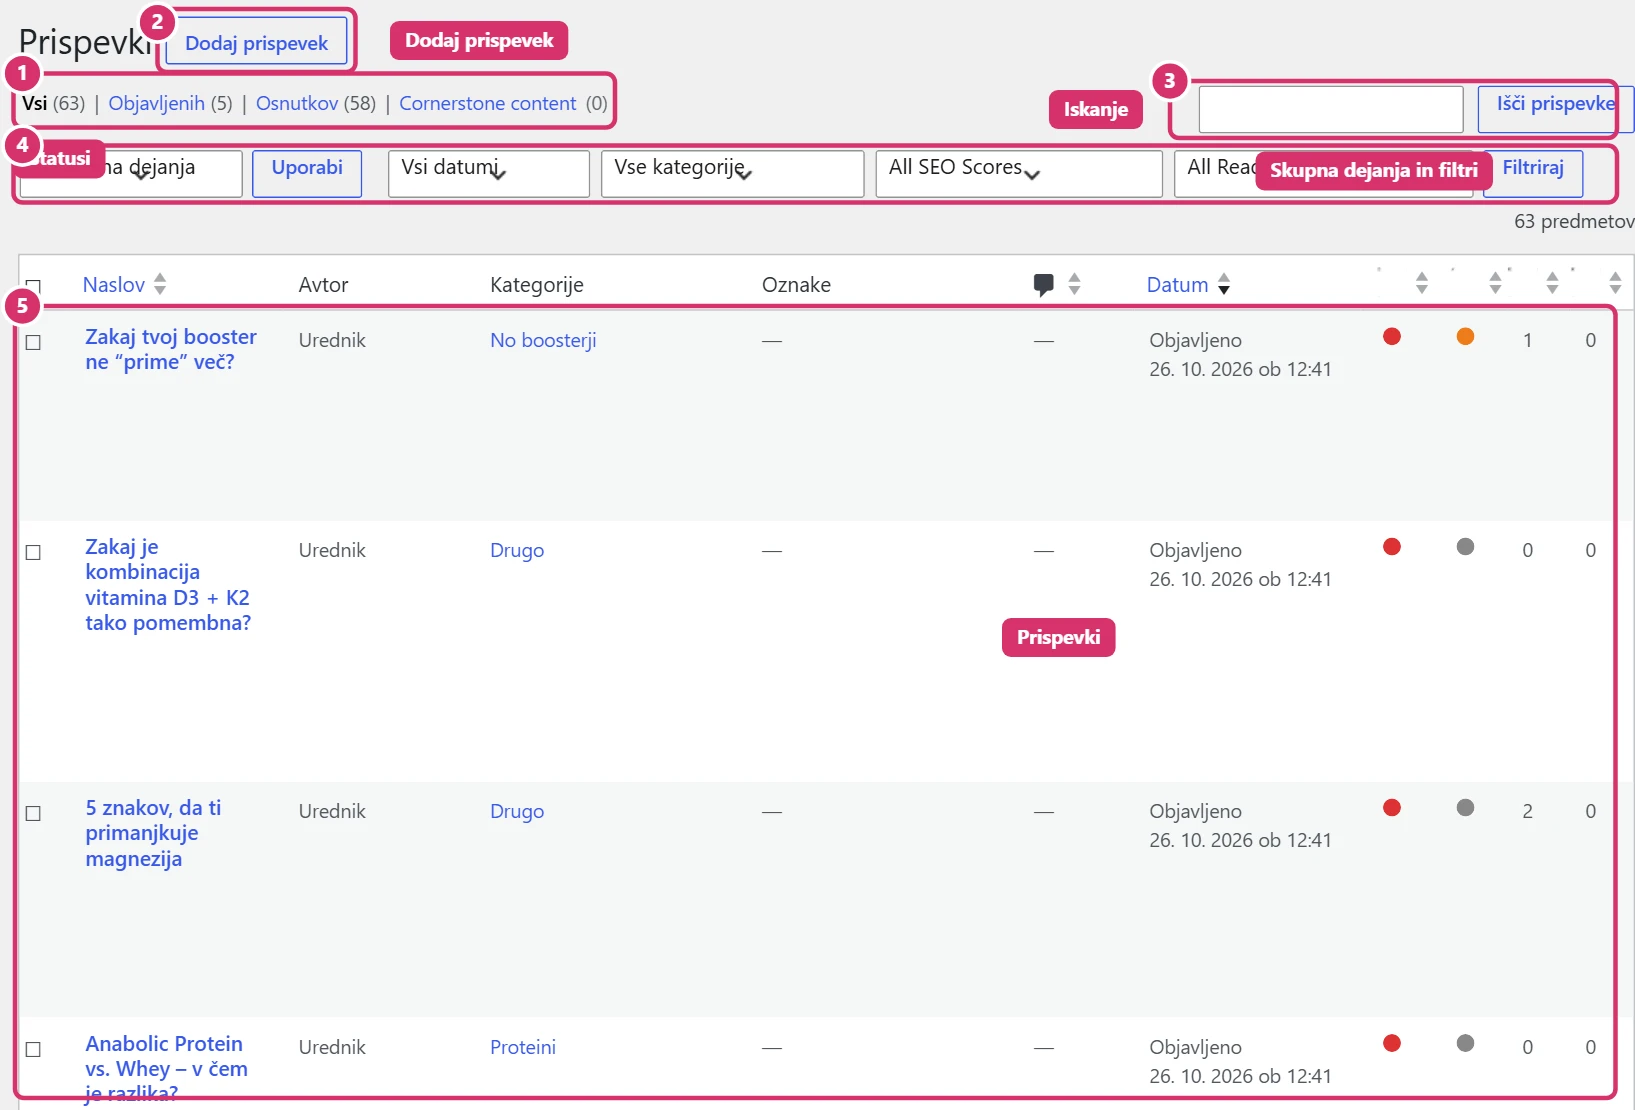
You see all posts under Posts → All Posts. At the top are the statuses (Published, Drafts, Bin), filters by category and date, and search. When you hover over a title, the links Edit, Quick Edit (title, date, categories, status), Move to Bin and Viewappear. The SEO columns show the content score, SEO title and meta description.
2. Writing a post
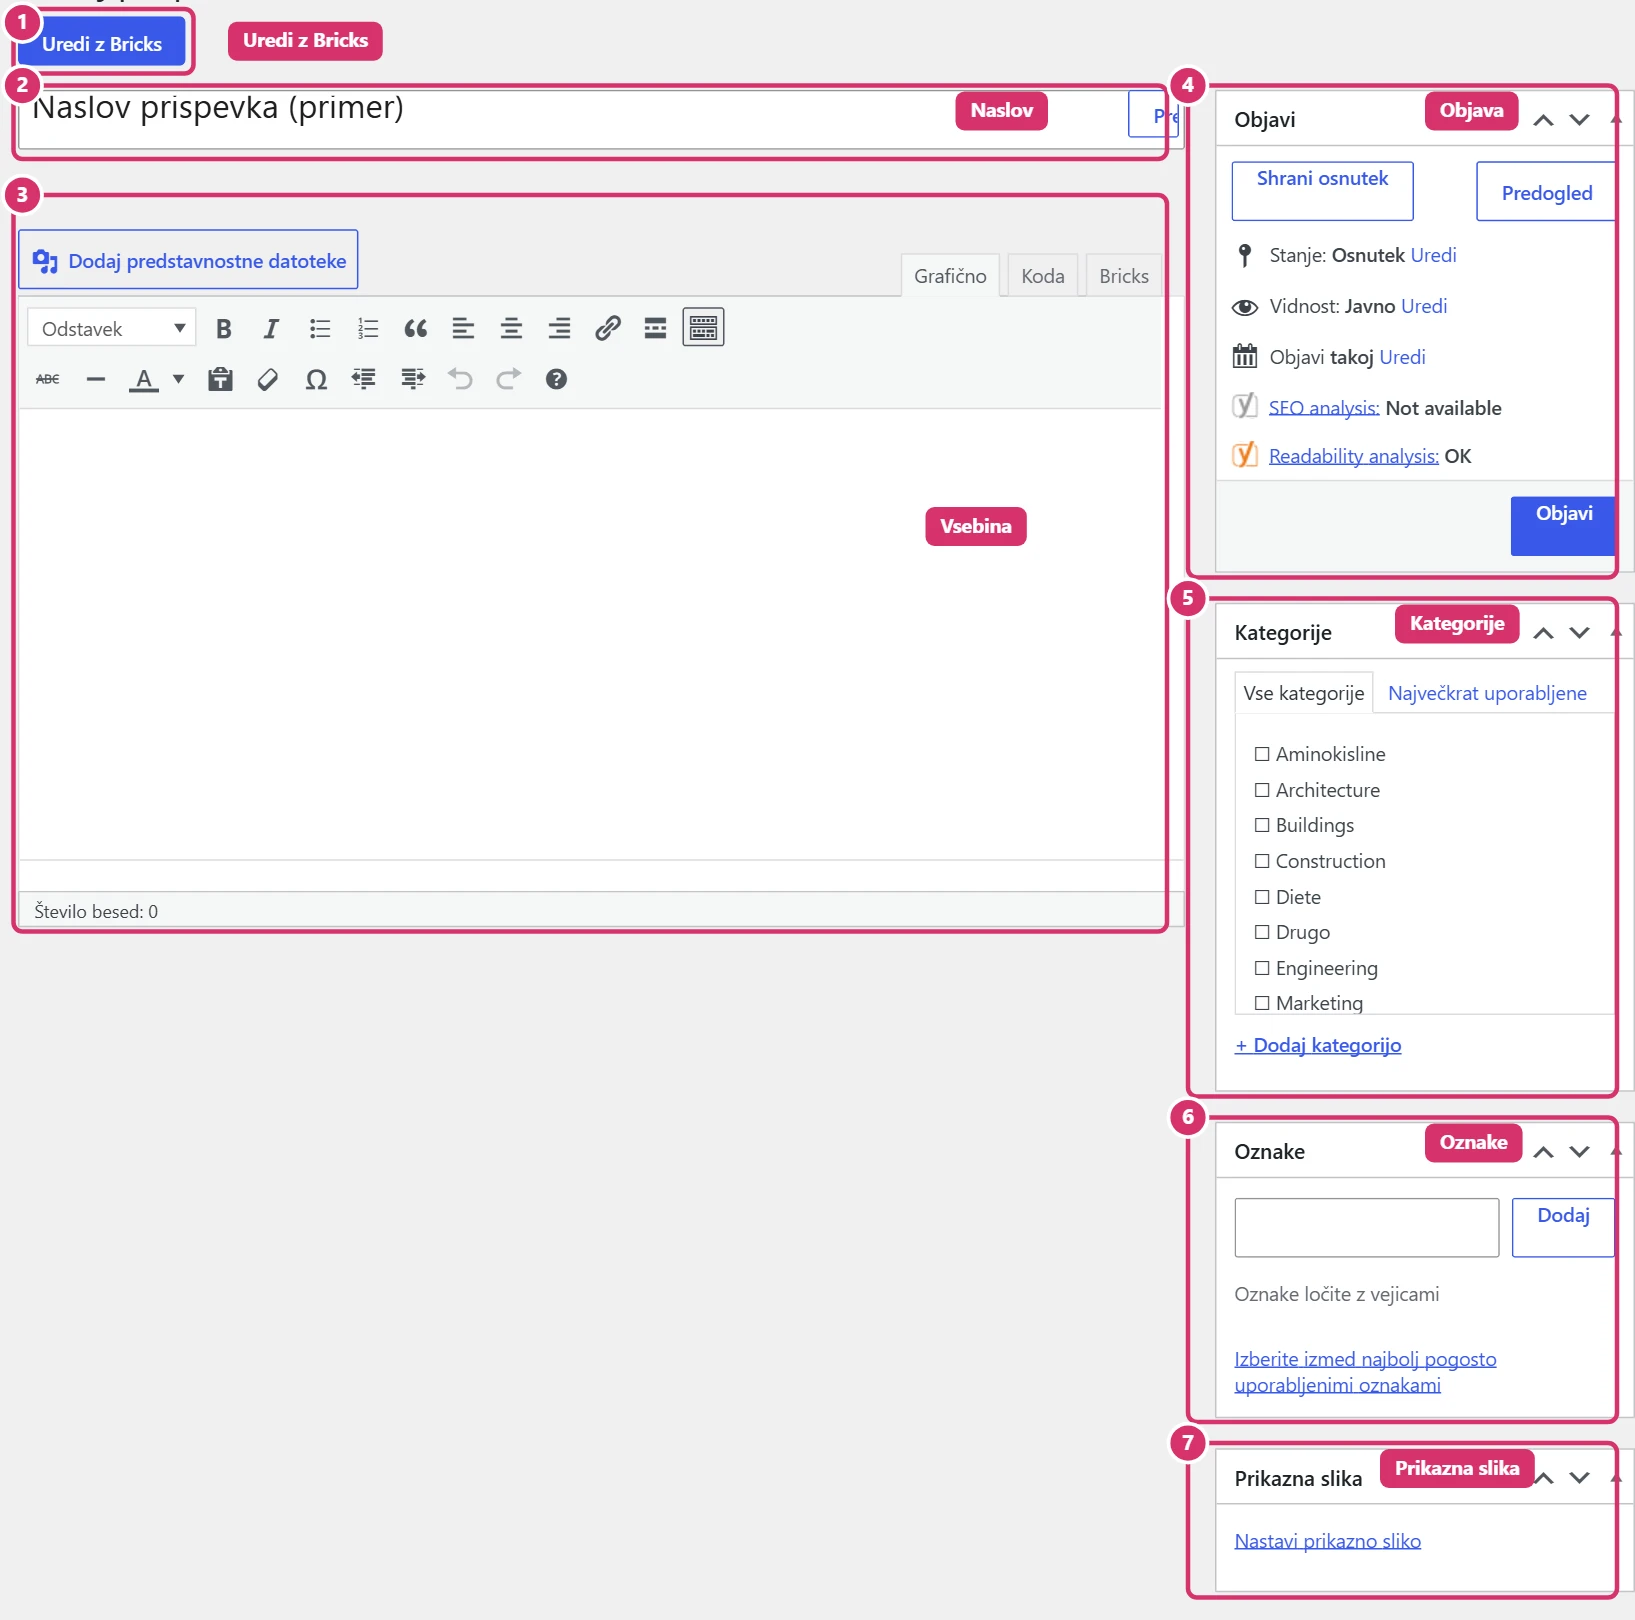
Click Add New Post and enter the title. Write the text in the content editor (the Visualtab); with the Add Media button, you add images (see Bricks – Images and files). If the post is designed with Bricks, click Edit with Bricks and edit the content in the visual editor. Mark headings within the text with the Heading 2 and Heading 3formats, not just bold.
3. Categories, tags and featured image
- Categories – put the post into one or two main topics. Add a new category with the link + Add New Category.
- Tags – more specific keywords, separated by commas.
- Featured image – the image shown in the article list and when shared on social networks. Click Set featured image and choose an image with ALT text filled in.
4. Publishing and scheduling
In the Publish box, you can save the content as a draft, view it with Preview, set the visibility (public, private, password-protected) and the publish date. If you choose a future date, the system publishes the post at that time on its own. Click Publish (or Schedule), then check the post on the website.
5. Post SEO
Below the editor, fill in the SEO plugin fields: the keyword, SEO title (up to 60 characters) and meta description (up to 160 characters). Detailed instructions are in Bricks – SEO with Rank Math; the same process applies to Yoast.