
You edit the products in your online store in WordPress under the Products menu: this is where you add them, edit the price, stock, images and categories, and publish them. This guide explains the product list, editing a product, the difference between simple and variable products, prices and sales, stock, images and publishing. The process is the same in all WooCommerce stores with Bricks; the screenshots are from the Peak store.
In short: a product in 6 steps
- Open Products → Add New Product (or choose an existing one).
- Enter the product name and description , and in the Product short description 2–3 key features.
- In Product data choose the product type, enter the price and, on the Inventory tab, the SKU and stock.
- Set the product image and, if needed, the gallery.
- Choose the category (and tags).
- Click Publish (or Update) and check the product on the website.
1. Product list
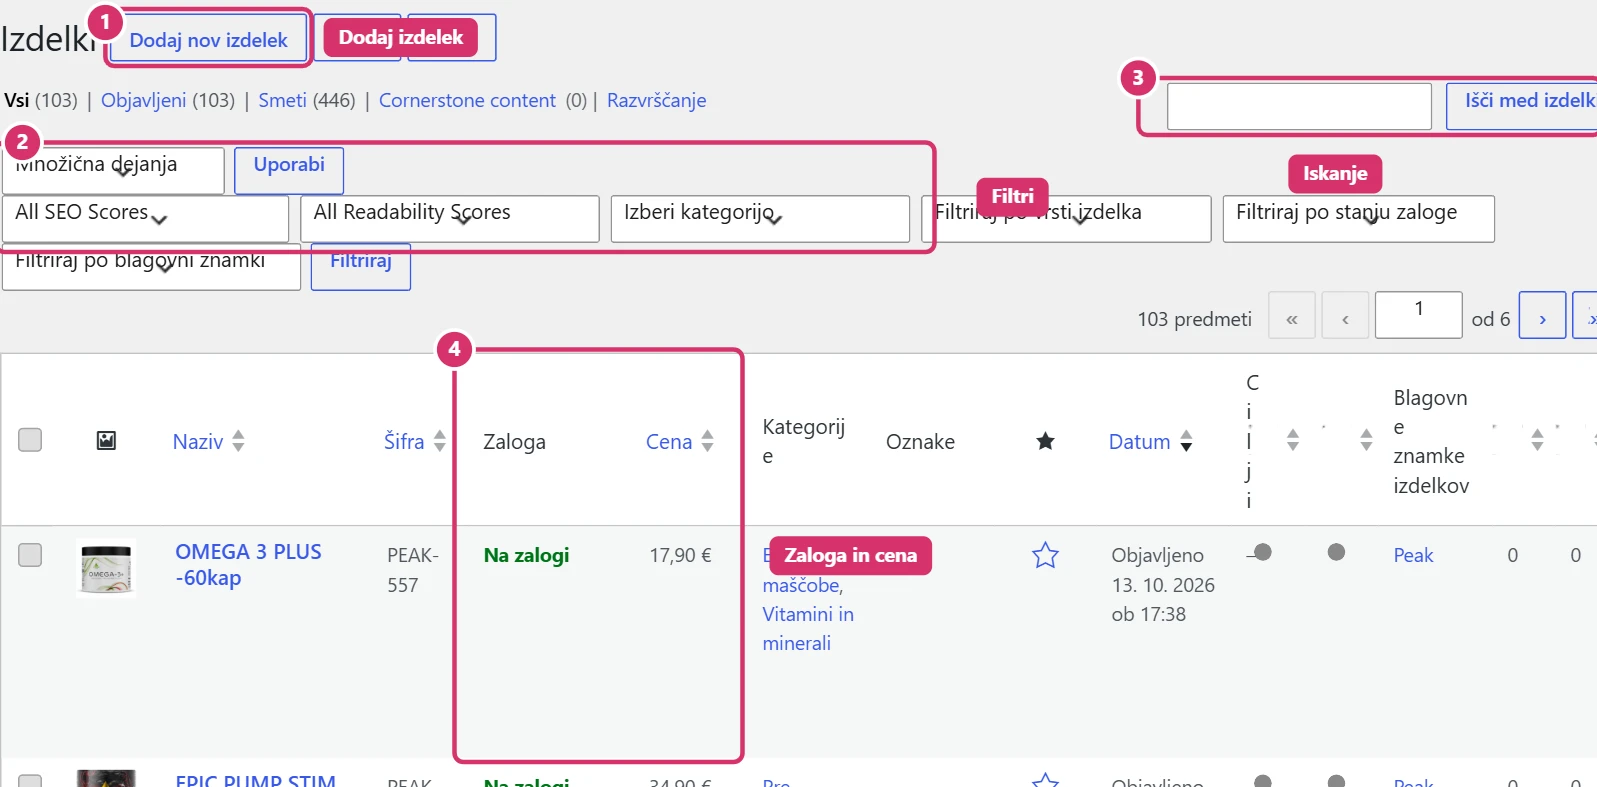
In the left menu, choose Products → All Products. The list shows the image, name, SKU, stock, price and categories. Above the list are:
- Add New Product – a new product.
- Filters – by category, product type and stock status, and by status (Published, Draft, Bin).
- Search – by name or SKU.
- Quick Edit – when you hover over a product, a Quick Editlink appears below the name, where you can quickly change the name, price and stock without opening the whole product.
If the list also has SEO score columns, that’s data from the SEO plugin (see the guide Bricks – SEO with Rank Math).
2. Editing a product
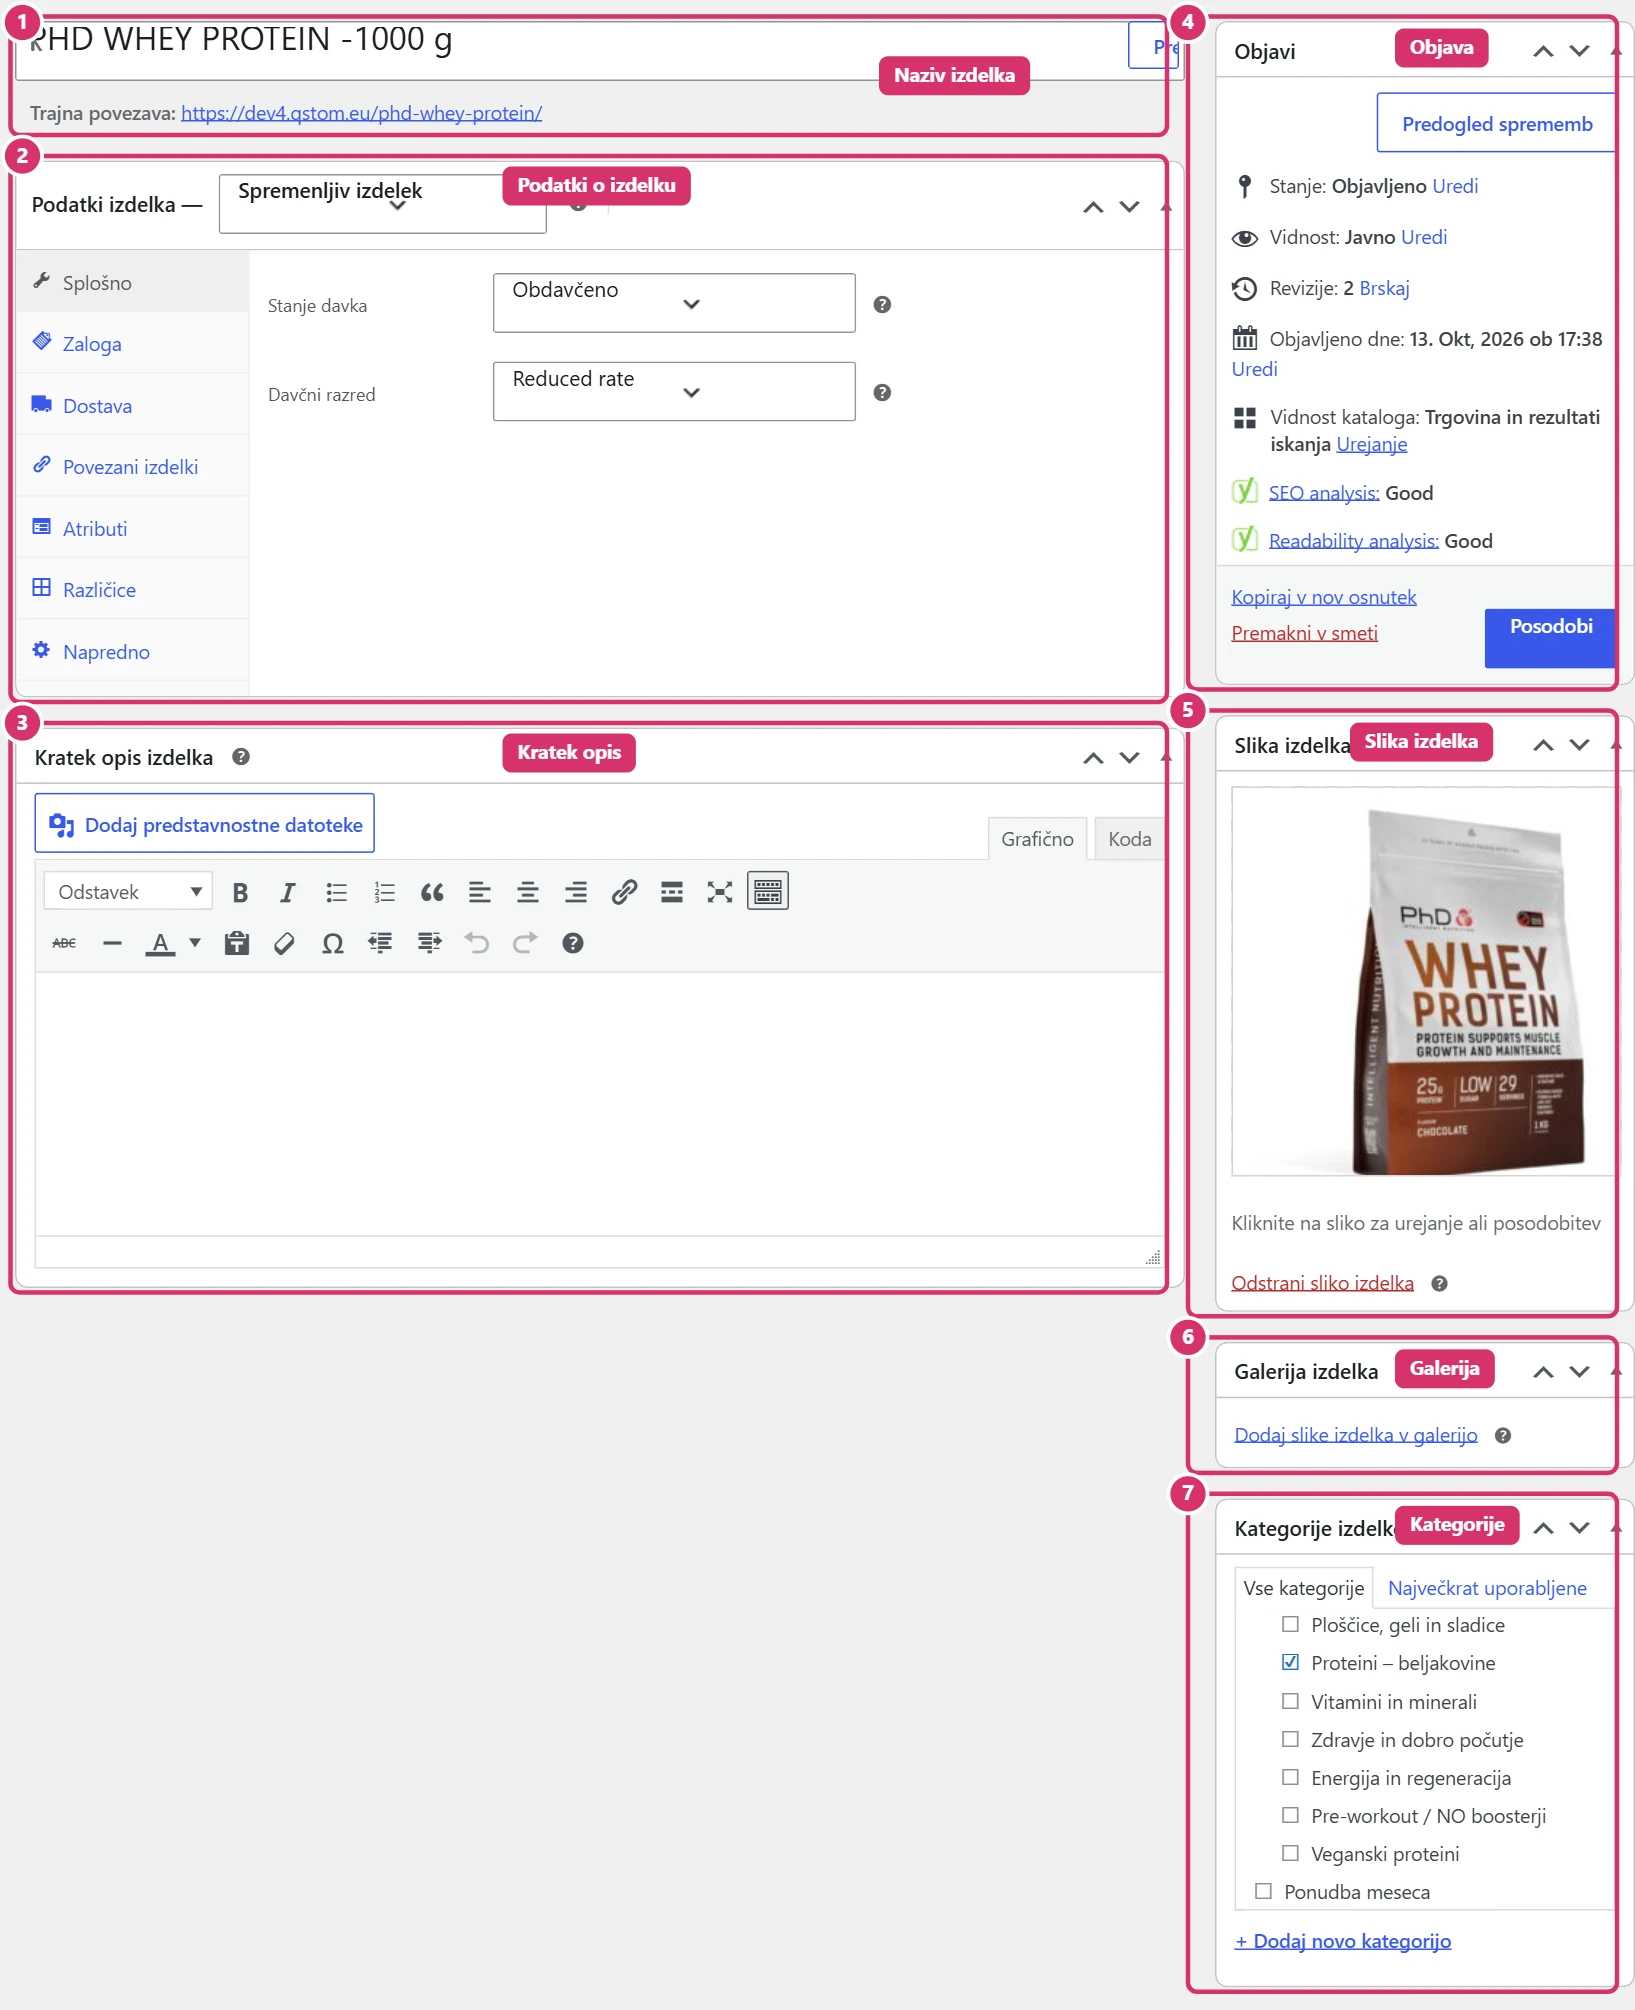
Click the name to open the product. The key parts of the screen:
- Product name – the name customers see. Below it is the product URL (permalink); don’t change it without checking with us.
- Product description – the full description (in some stores it’s shown in a tab below the product). Use subheadings and short paragraphs.
- Product data – product type, price, stock, shipping, linked products, attributes and variations.
- Product short description – 2–3 highlights, usually shown next to the price.
- Publish – status, visibility, date and the Publish or Update.
- Product image, Product gallery and Product categories in the right column.
3. Product type
In the Product data box there’s a product type drop-down:
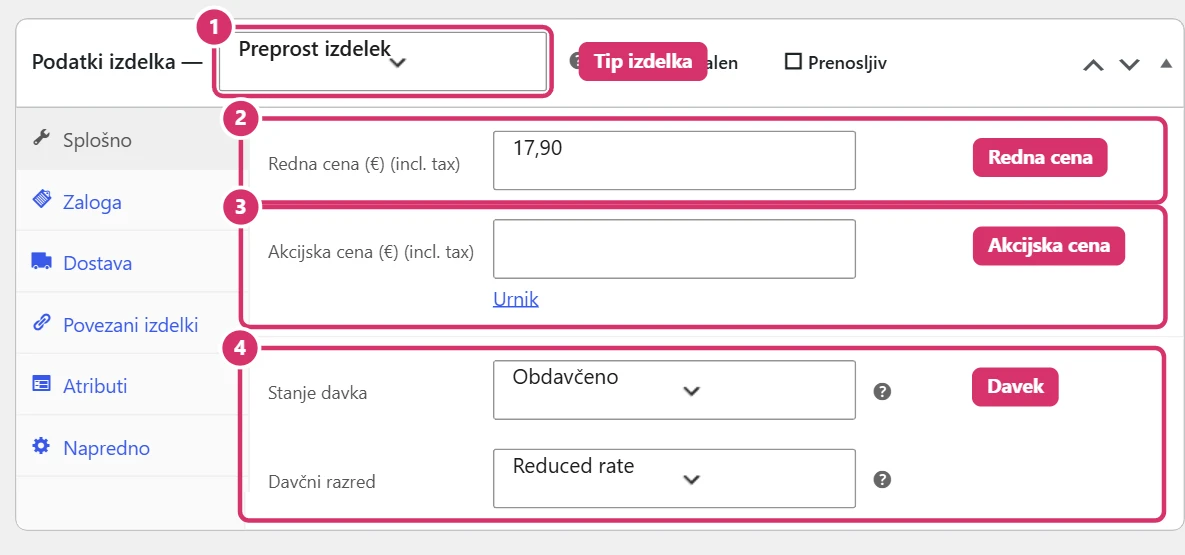
- Simple product – one product with one price (e.g. one pack size).
- Variable product – a product with variations, e.g. flavour or size; each variation has its own price and stock. Prices are set on the Variations tab, not on the General tab.
- Grouped product or External/Affiliate product are only used in exceptional cases.
Don’t change the type of an existing product without checking with us, as variation prices can be lost.
4. Price and sale
For a simple product, on the General tab, enter:
- Regular price – the normal price, with a decimal comma or point (e.g. 17.90).
- Sale price – a lower price during a sale. The regular price is shown crossed out on the website. With the Schedule link, set the start and end of the sale, so the price goes back to normal on its own.
- Tax status and tax class – usually stay as they are (Taxable, standard rate). If you enter prices including VAT, enter them exactly as customers see them.
After changing the price, click Update. Prices in the product list update straight away.
5. Stock and SKU
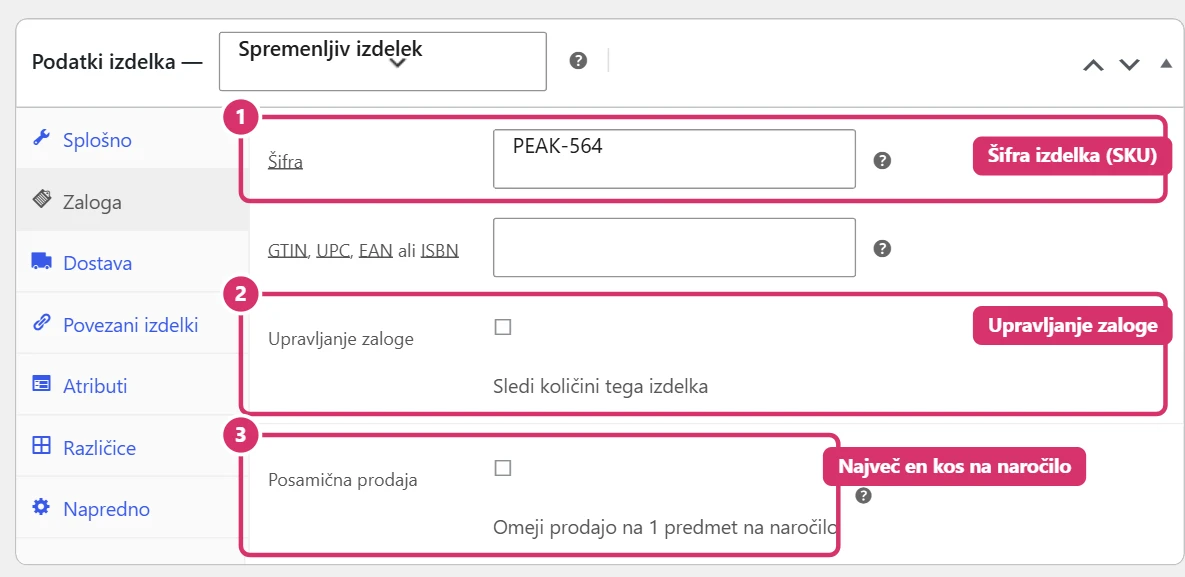
On the Inventory tab you’ll find:
- SKU – a unique code for finding the product in the list and in orders. Don’t duplicate it.
- Manage stock – if you turn it on, enter the quantity and WooCommerce automatically reduces stock with every order. If it’s off, choose the status manually: In stock, Out of stock or On backorder.
- Sold individually – customers can add at most one item to an order.
The Shipping tab contains weight and dimensions, used by some shipping methods; fill them in if your store requires it.
6. Product images
- Product image – the main image in lists and on the product page. Click Set product image, choose the image and confirm. Use the same aspect ratio and a white or consistent background for all products.
- Product gallery – extra images (Add product gallery images). Change the order by dragging.
- Prepare images as described in the guide Bricks – Images and files: up to 2000 px, up to 300 KB, a descriptive name and alternative text (ALT) with the product name.
7. Categories and tags
In the Product categories box, tick one or more categories the product belongs to (a subcategory together with its parent). The product then appears in the right archive and in the store’s filters. Tags are for extra grouping (e.g. vegan), not a replacement for categories. Create new categories under Products → Categories.
8. Publishing, preview and deleting
- Save Draft – the product stays hidden; Preview Changes shows how it will look.
- Publish or Update – changes become visible to customers. After publishing, always check the product on the website (View product).
- Catalog visibility – sets whether the product is visible in the shop, in search or both; a hidden product is only reachable by its link.
- Move to Bin – the product is taken off the website, but you can restore it in a few steps (Bin → Restore). Don’t delete permanently without checking with us.