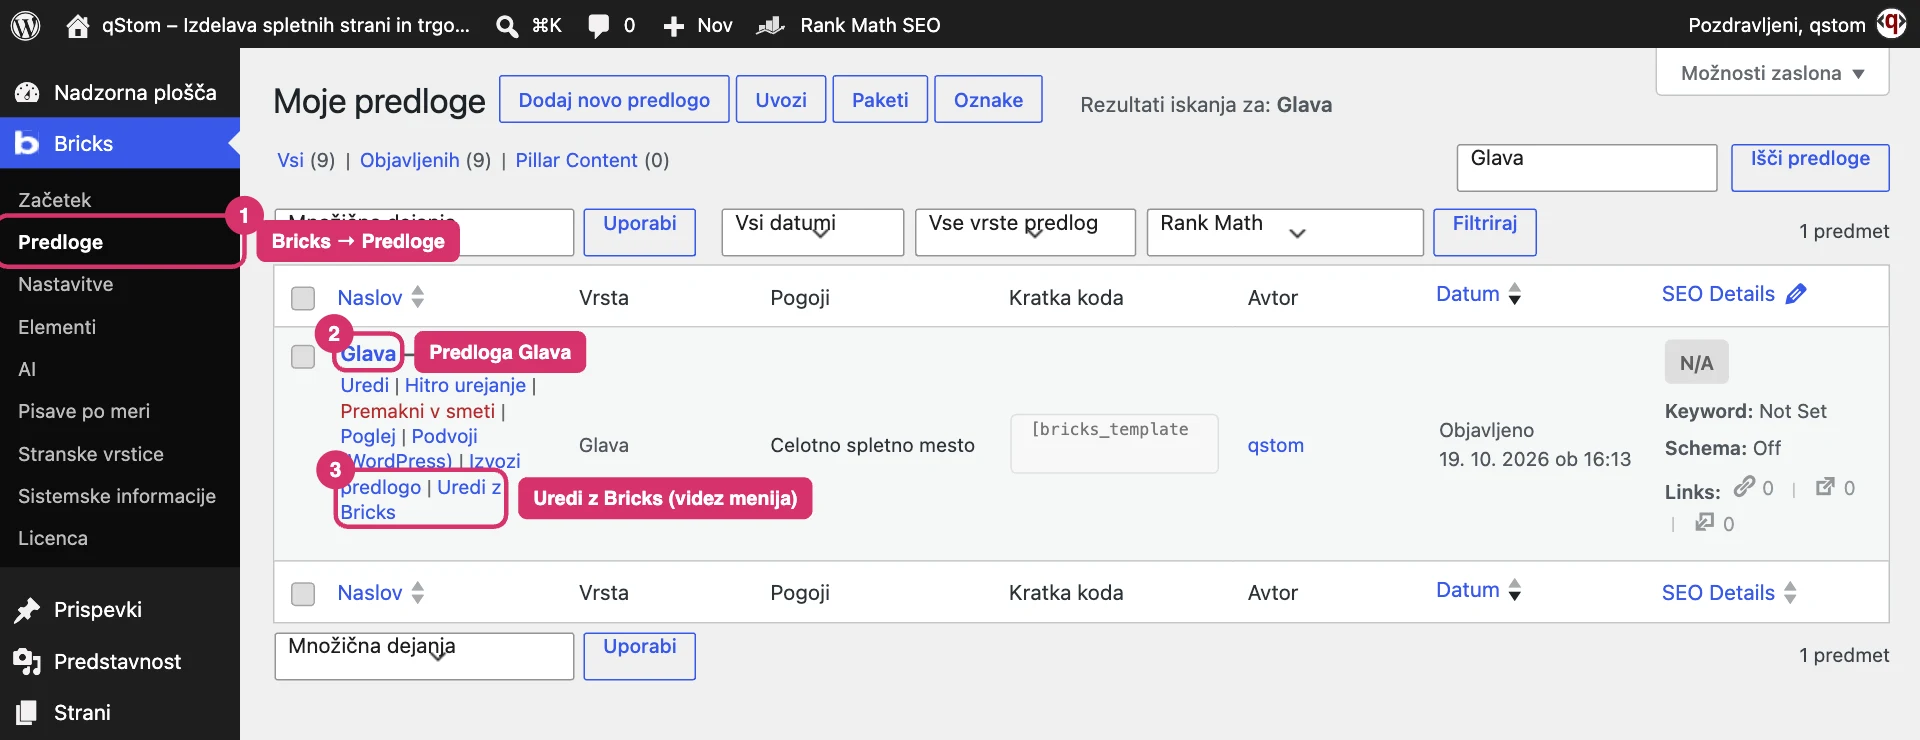
The main menu on your website is shown by the Bricks Nav Menu element in the Header template, and you edit the menu items in WordPress under Appearance → Menus. Once saved, changes show straight away on every page, in both the desktop and mobile menus. This guide explains how to rename an item, add a new page, create a submenu and save your changes.
In short: editing the menu in 6 steps
- Log in to the admin and open Appearance → Menus.
- Check that the Main menu is selected.
- Edit an item by clicking the arrow on the right of the item.
- To add a new page, tick it on the left and click Add to Menu.
- Arrange items by dragging; indenting to the right creates a submenu.
- Click Save Menu and check the change on the website.
Video: editing the menu
1. Open the menu editor
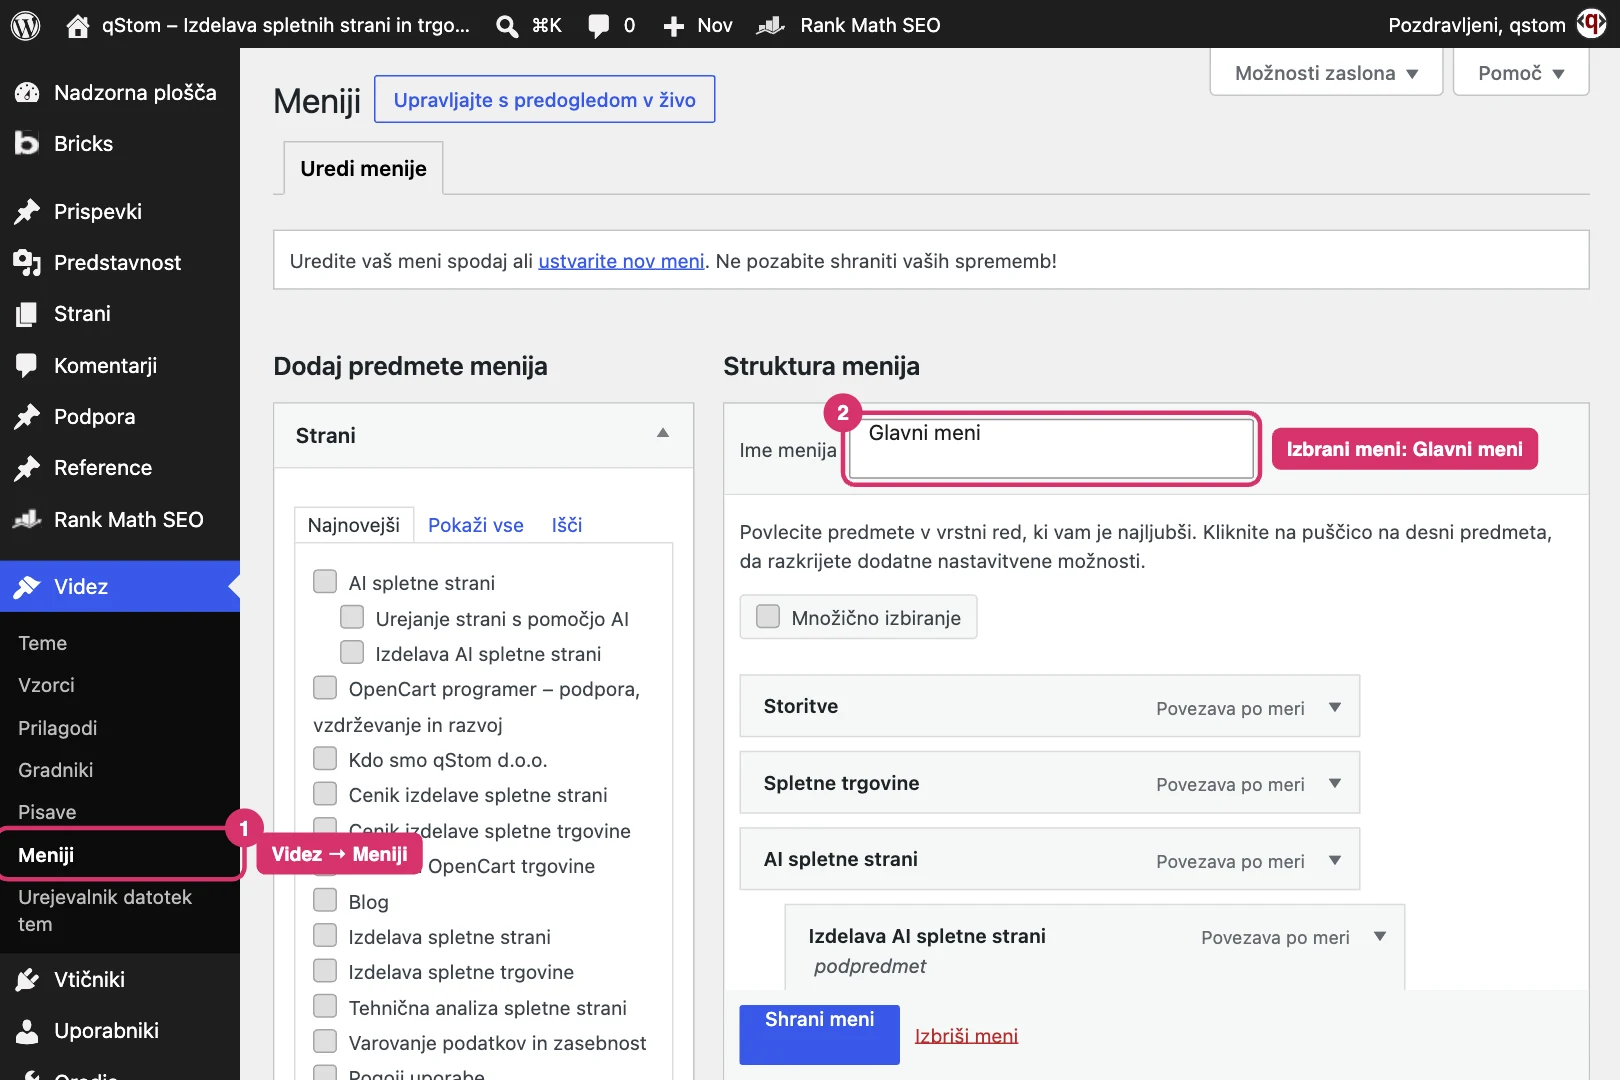
In the left column of the admin, choose Appearance → Menus. The Menu Name field must show the Main menu – this is the menu Bricks shows in the page header. If you have several menus, choose the right one in the drop-down above the editor and click Select.
2. Edit an existing item
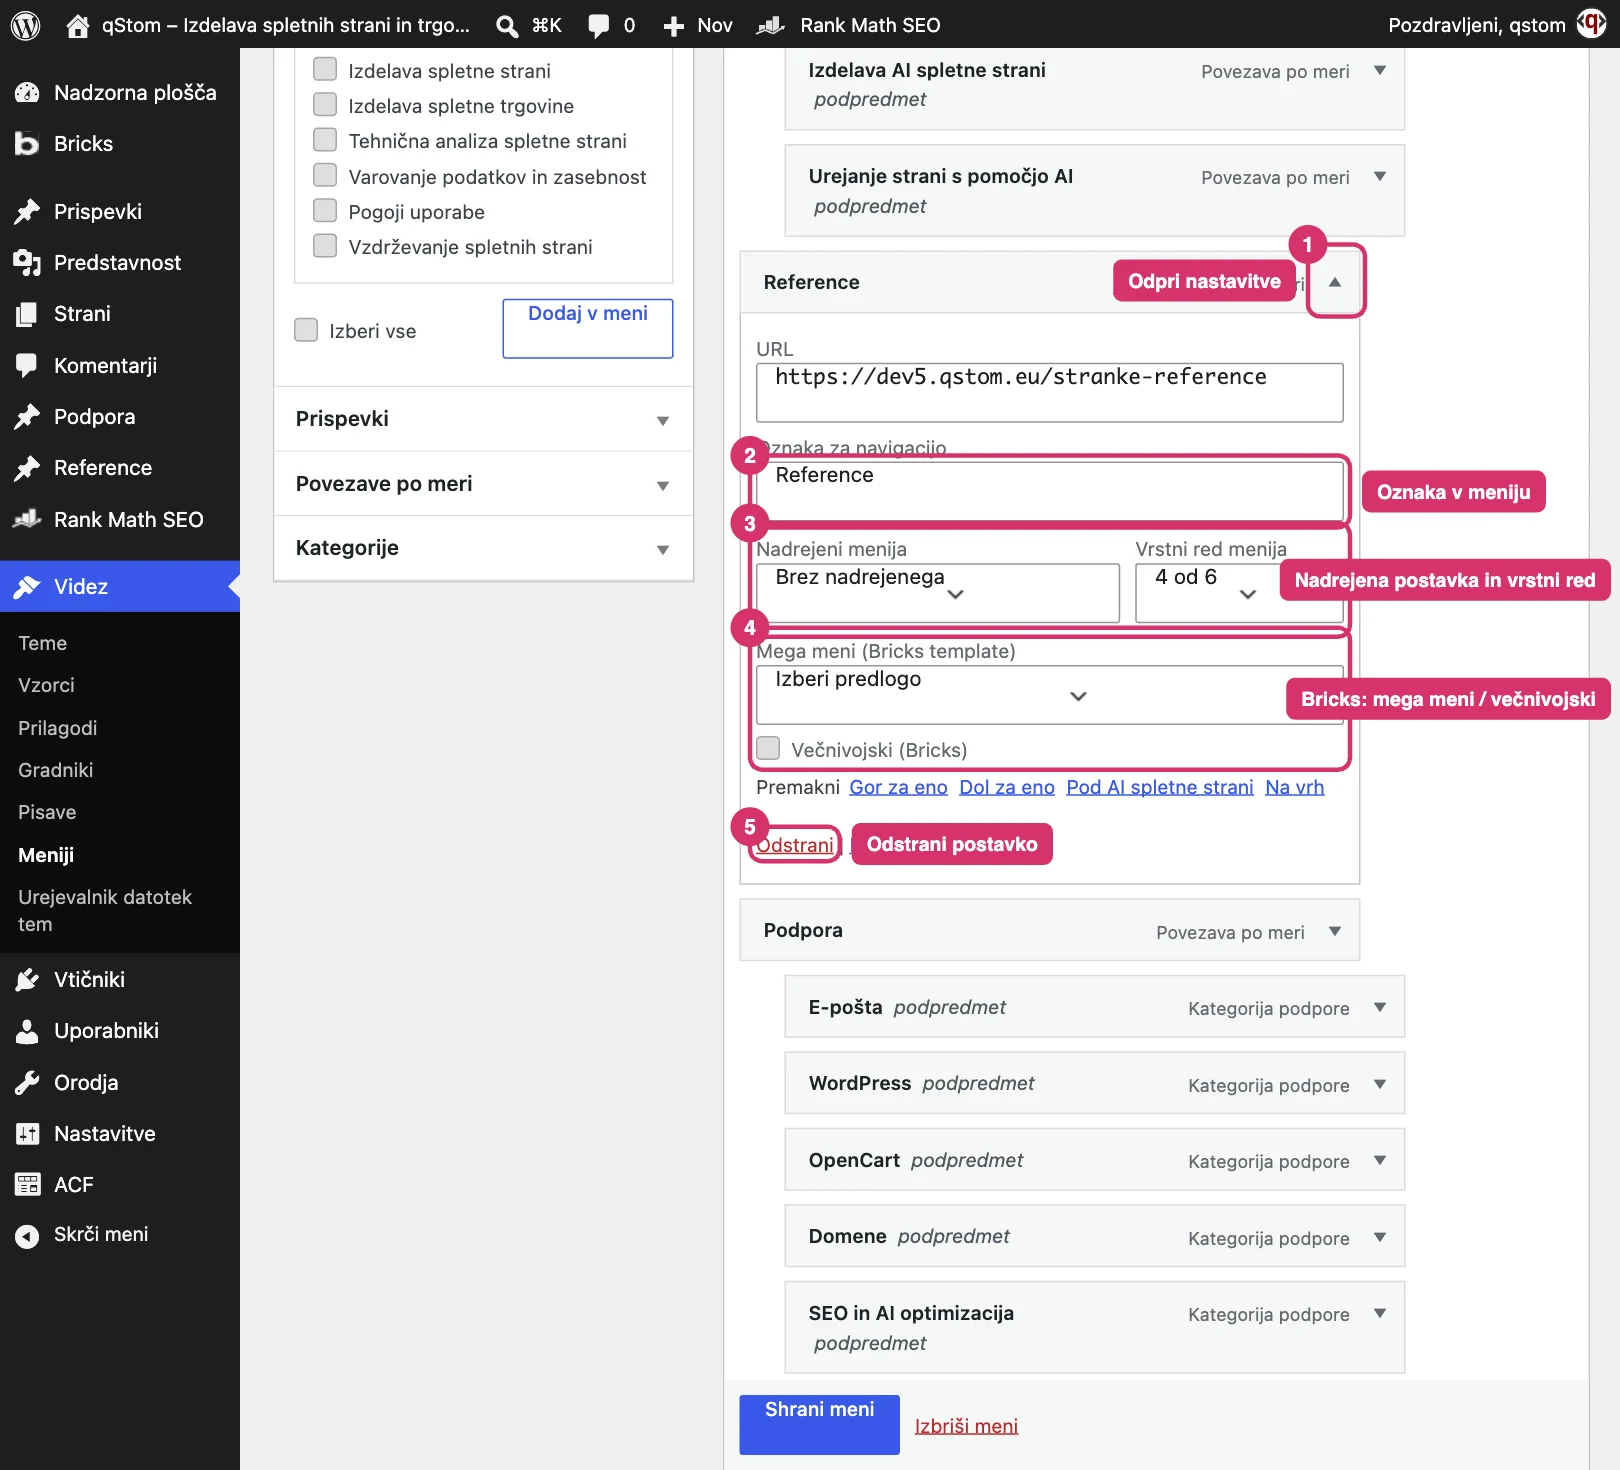
Each menu item has an arrow on its right. Click it to open the item’s settings:
- Navigation Label – the text shown in the menu. You can change it without changing the page title.
- Menu parent and order – set which item it appears under and in what position.
- Mega menu (Bricks template) and Multilevel (Bricks) – special Bricks settings for expanded drop-down menus. If you’re not sure, leave them as they are.
- Remove – removes the item from the menu (the page itself stays published).
3. Add a new item
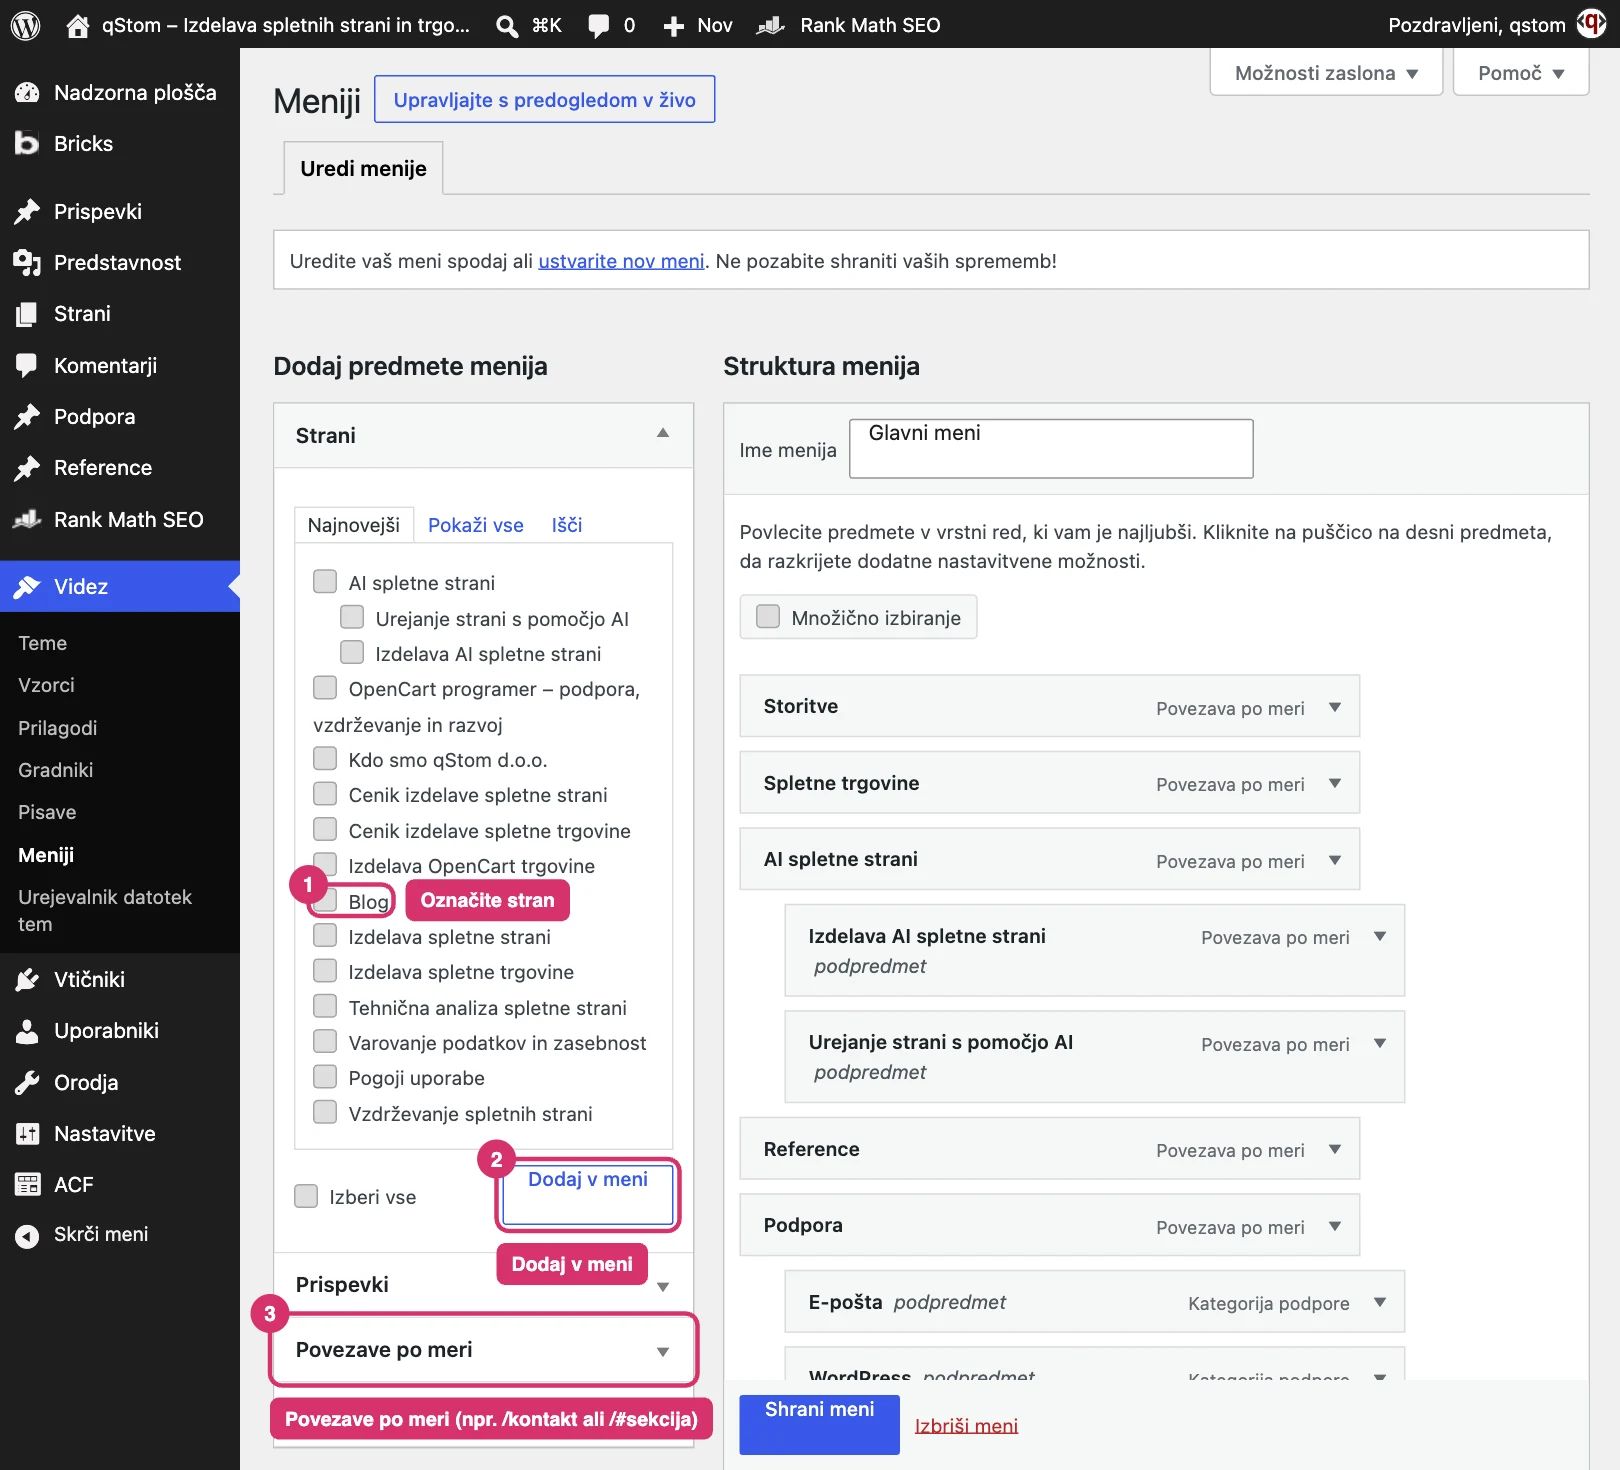
In the left column, Add menu items, choose what you want to add:
- Pages – tick one or more pages and click Add to Menu.
- Custom Links – enter a URL (e.g.
/contactor a link to a section,/#services) and the link text. - Categories – a link to a category archive.
The new item is added to the end of the menu; then drag it to where you want it.
4. Create a submenu
Grab an item and drag it below another item and slightly to the right. When the sub item label appears, the item will show in the parent item’s drop-down menu. You can do the same by choosing a Menu parent in the item settings.
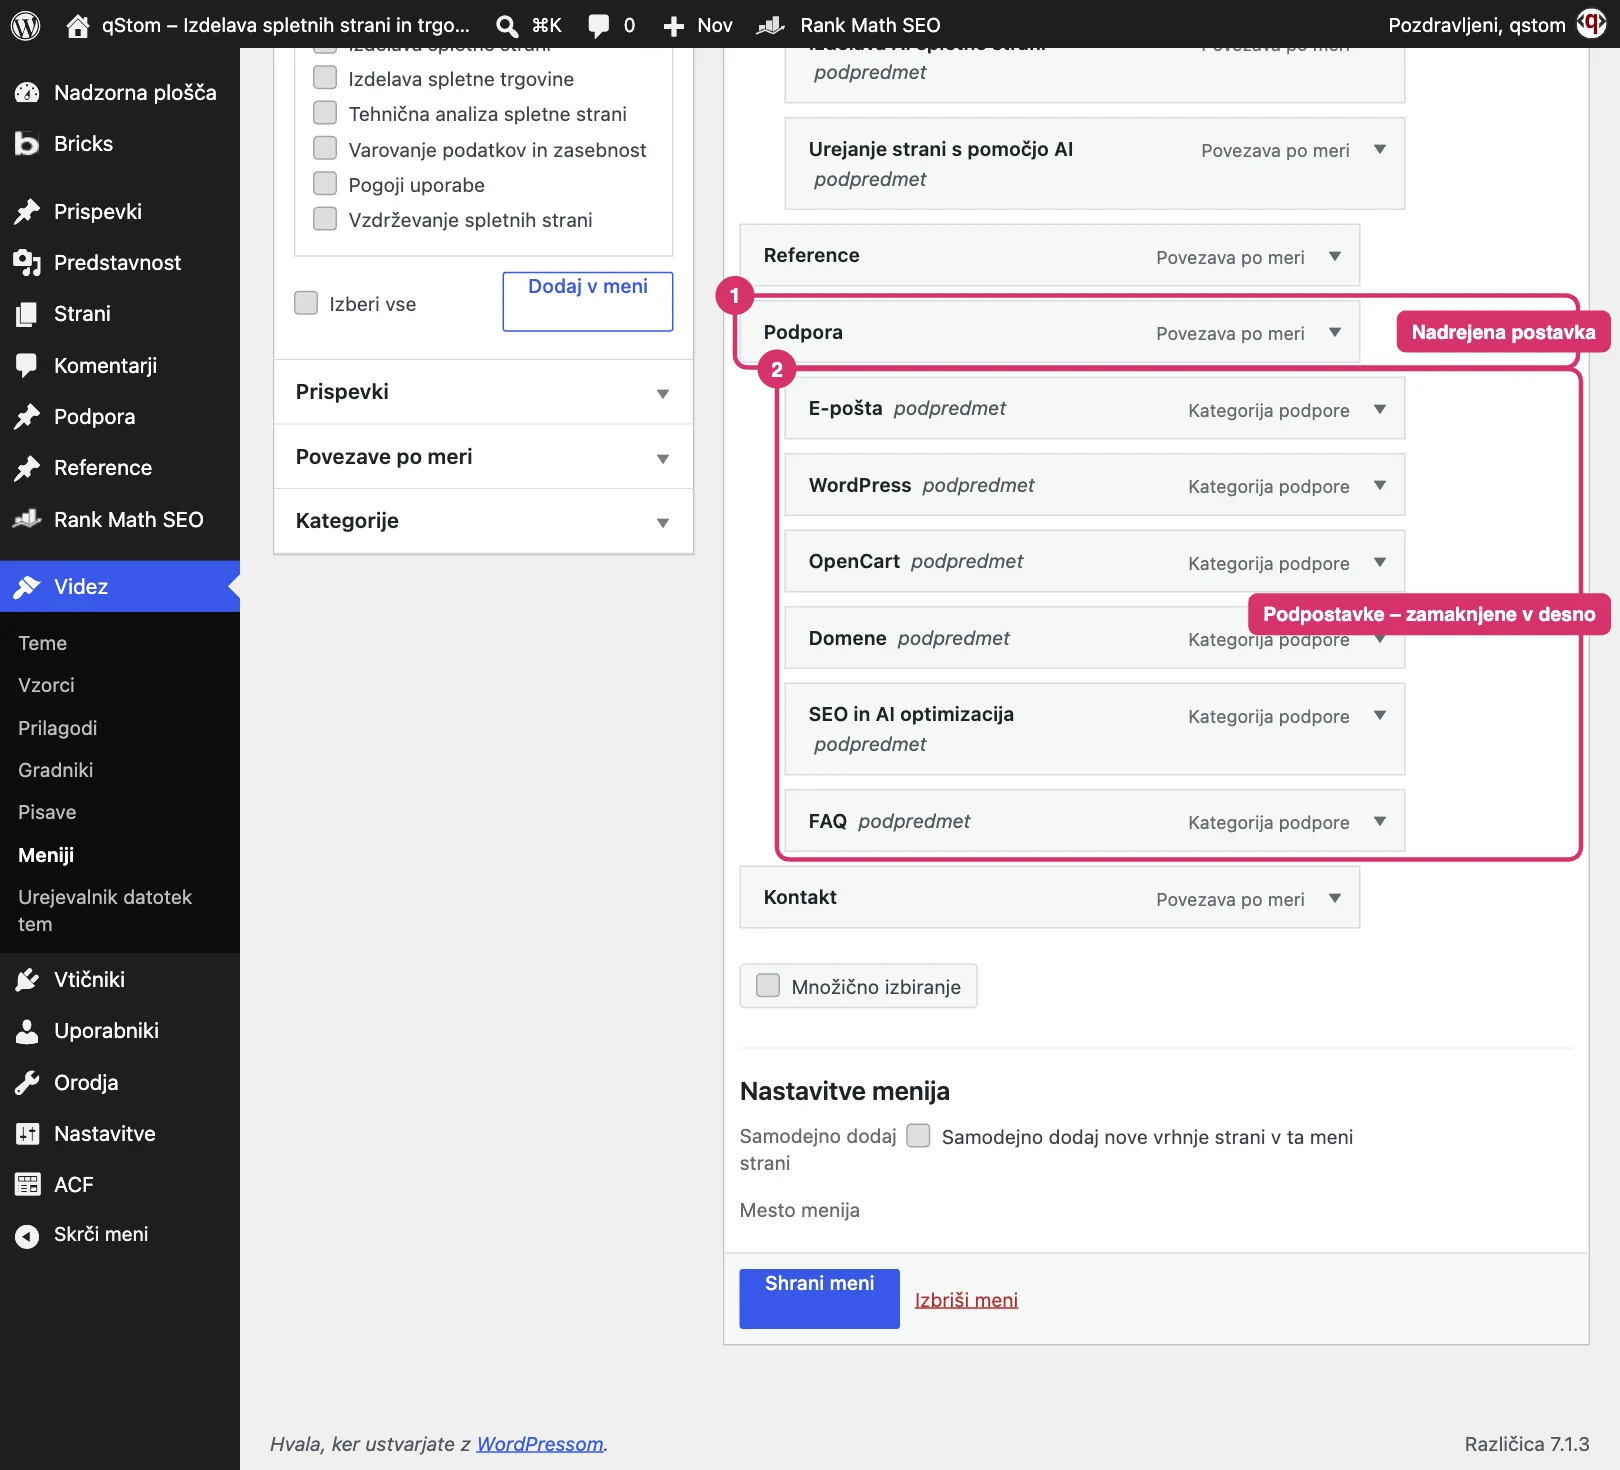
5. Save the menu
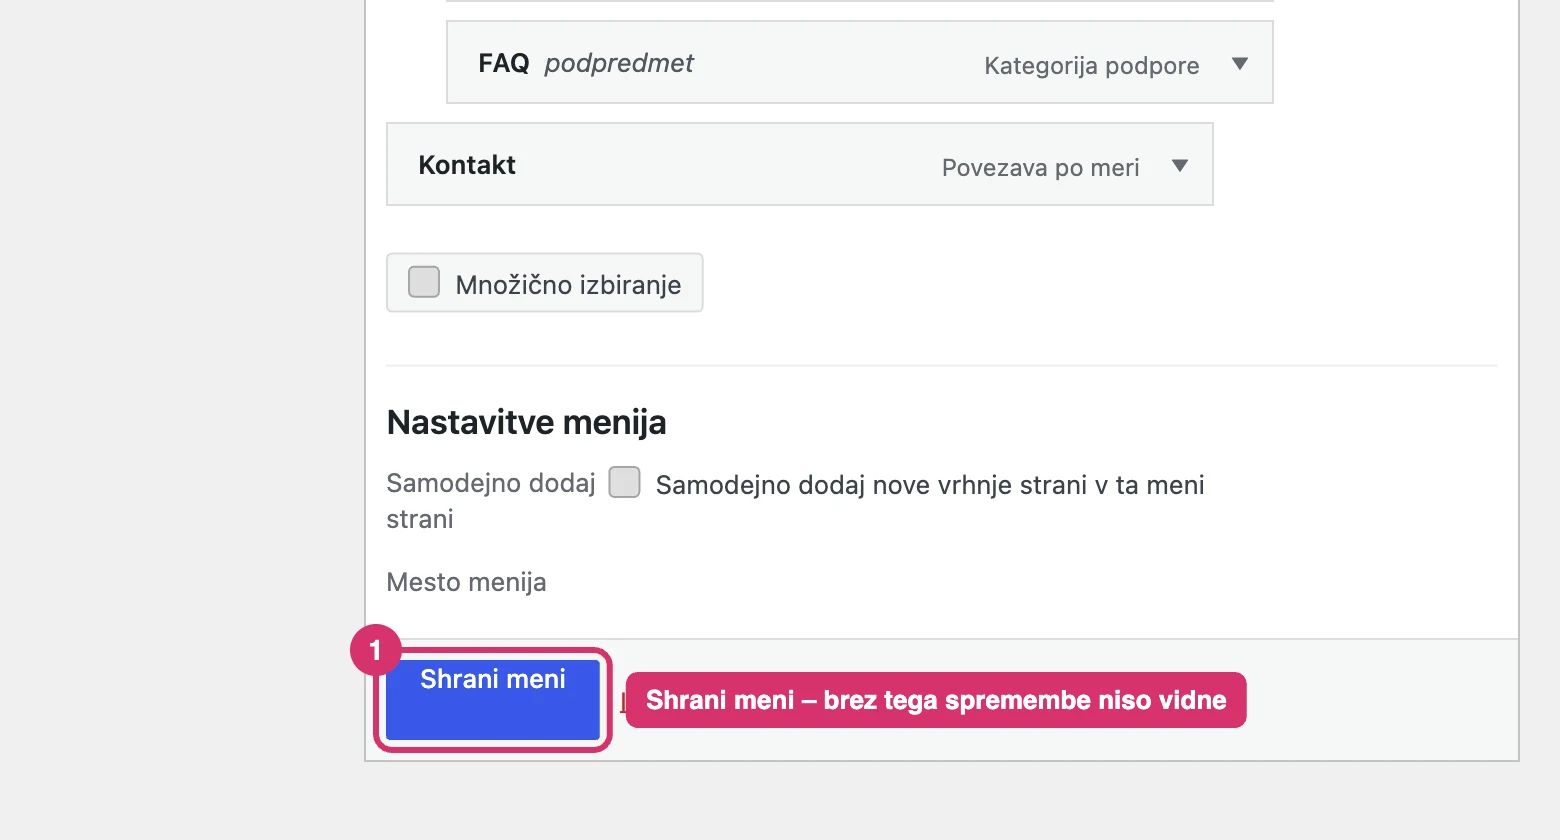
Changes aren’t visible until you click the blue Save Menu button below the menu structure.
6. Check the menu on the website
Open the website in a new tab and check the main menu and drop-downs. If you don’t see the changes, refresh the page without the cache (Ctrl+F5 or Command+Shift+R).
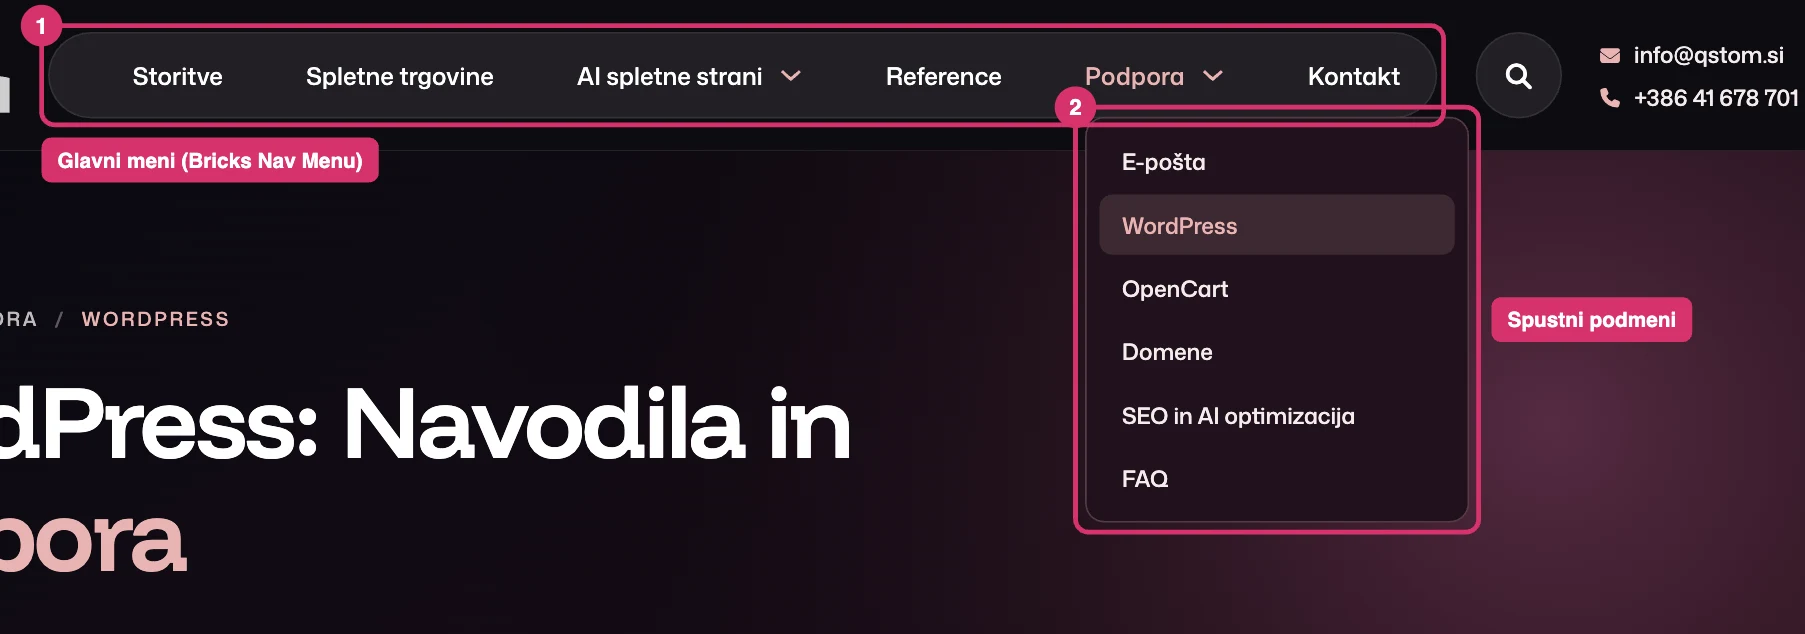
Where is the menu in Bricks, and what do we edit there?
The menu’s look – colours, font, spacing, the background around the menu, search and the mobile menu – is set by the Nav Menu element in the Bricks Header template (Bricks → Templates → Header). That’s also where you set which WordPress menu is shown. You don’t edit the menu’s content in Bricks; always use Appearance → Menus to change items. We recommend leaving changes to the menu’s look to us, as they affect every page.