
Product categories sort the products in your store into groups (e.g. Proteins, Vitamins), and brands show who the manufacturer is; you edit both in the Products menu. Categories help customers find products in the menu, filters and archives, and brands let them search by manufacturer. This guide explains how to create and edit categories and brands, set up the hierarchy and what to watch out for when deleting. The screenshots are from the Peak store.
In short: categories and brands in 6 steps
- Open Products → Categories (brands: Products → Brands).
- In the Add new category form, enter the name.
- If needed, choose a parent category (subcategory).
- Write a short description and add a thumbnail.
- Click Add new category.
- Assign the category and brand to products when editing a product.
1. What’s a category and what’s a brand
- Category – the type of product (Proteins, Vitamins, Pre-workout). A product can be in several categories. Categories form a tree: Sports nutrition → Amino acids.
- Brand – the manufacturer or brand (e.g. PhD Nutrition). A product usually has one brand.
- Tag – optional, free grouping (e.g. vegan). It’s not a replacement for categories.
2. Category list
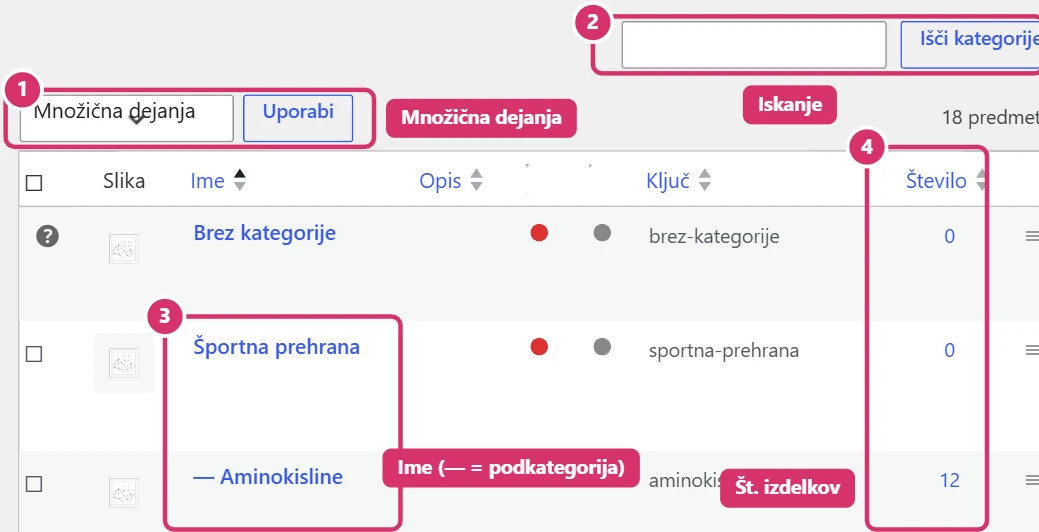
In the left menu, choose Products → Categories. On the right is a list of all categories:
- Subcategories are marked with a dash (— Amino acids).
- The Count column shows how many products are in the category; click it to open those products.
- Next to the name are the links Edit, Quick Edit, Delete and View.
- If the page has SEO score columns, that’s data from the SEO plugin (see Bricks – SEO with Rank Math).
- The Uncategorised category is the default; don’t delete it, and don’t leave products in it.
3. New category
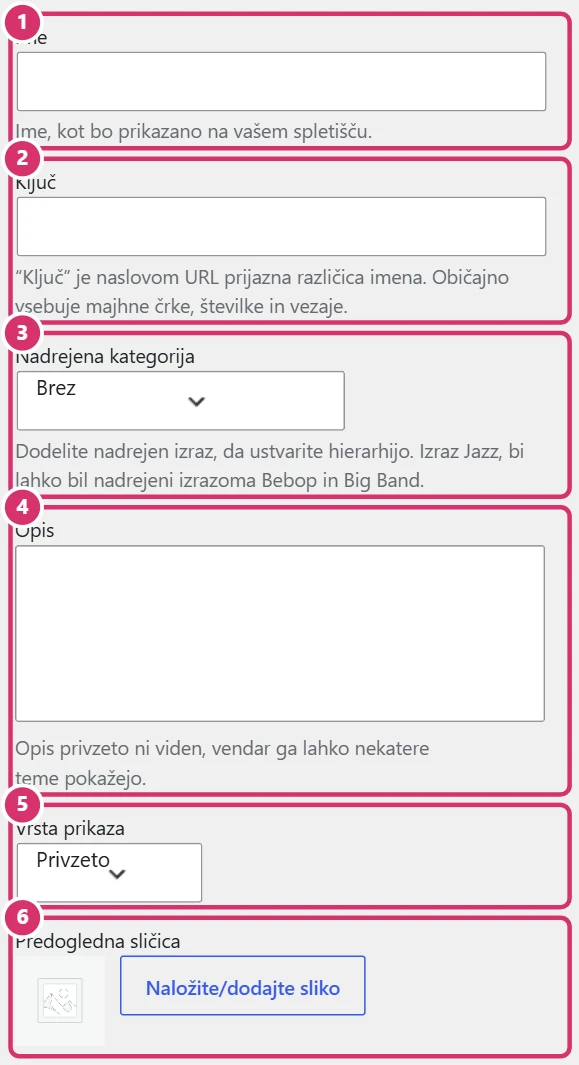
Fill in the form on the left:
- Name – as customers see it. Short and clear.
- Slug – part of the URL; you can leave it empty, as it’s created automatically (lower case, no accented letters).
- Parent category – choose one if it’s a subcategory. Leave it as None for a main category.
- Description – a short text about the category. It may be shown at the top of the archive and helps SEO; write 2–4 sentences.
- Display type – usually Default; only change it by agreement.
- Thumbnail – the category image (Upload/Add image). Use the same aspect ratio for all categories.
Then click Add new category at the bottom of the form. If the page has extra fields (e.g. SEO), fill them in in the same form.
4. Editing and hierarchy
- Edit – opens all the category details; change the name, description, thumbnail or parent category.
- Quick Edit – changes only the name and slug, without opening the details.
- Parent category – a product in a subcategory is automatically visible in the parent category too, if the category includes or shows subcategories.
- Don’t change the slug of a published category without checking with us: the URL changes and the old one breaks.
- Don’t create overly deep trees (2–3 levels at most), so the menu stays clear.
5. Assigning to products
Assign a category when editing a product, in the Product categories box (right column) – see the guide Bricks – Products. You can also change categories on several products at once: tick the products in the product list, choose Bulk actions → Edit and tick the category.
6. Brands
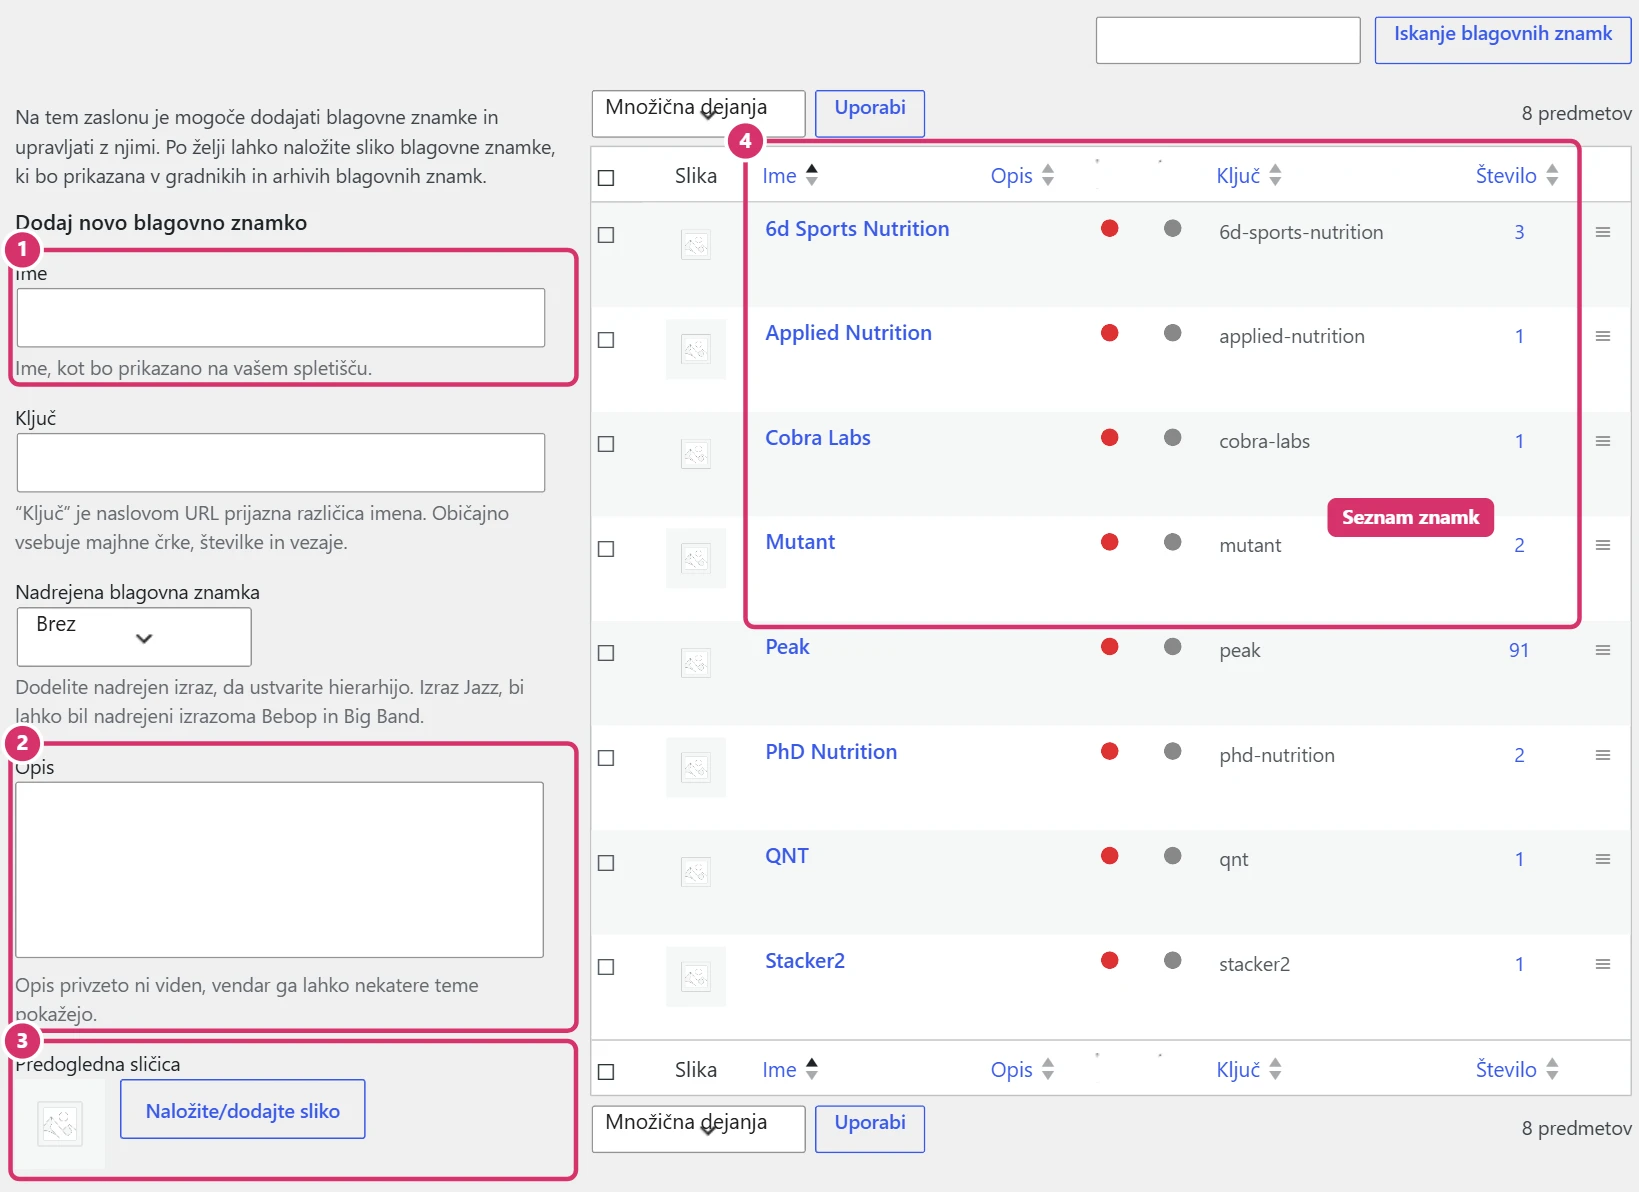
Brands are under Products → Brands and are edited just like categories: on the left the form for a new brand (name, slug, parent brand, description, thumbnail with the logo), on the right the list with the number of products. The logo should be clean, on a white or transparent background. Assign a brand to a product in the Brands box when editing the product.
7. Deleting and good practice
- Delete a category or brand only if you really don’t need it. Products aren’t deleted but lose this assignment (when a category is deleted, they move to Uncategorised).
- Before renaming, check where the category is used (menu, filters, links in text).
- Name things the way customers search: Proteins, not PRT-01.
- Every category should have a description and thumbnail, as it’s often a landing page from Google.
- Avoid duplicate categories (Proteins and Protein).